Advertisement 300 X 250

Girls' Best Friend

Bright and sparkly. Gemstones came to my mind when I was removing this Dragon Fruit and Orange jelly from the mould. Like a combination of gemstones...rubies, amber and diamonds, all in one!

Dragon's Eyes

The literal translation for the name of a small brown, juicy exotic fruit from the lands of Asia, known as Longan in Chinese, packed into these muffins

Nostalgia

A taste from the humble beginnings, the Long Bean Rice brings back beautiful memories of the yesteryears

Light and Fluffy

Lemon, Yogurt and Cranberries~a nice blend of flavours in a light and fluffy chiffon cake

Bread Stories

Asian style buns ~ Popular as breakfast food or snack, sweet/savoury fillings wrapped in soft, cottony bread

Sunday 30 October 2011

Happy Birthday Papa


Happy Birthday Papa! I am so happy that I managed to make you a cake for the second time.  I was tempted to buy this time around as I was still finding it a little difficult to adjust to some new changes in life leaving me without the mojo and limited time to squeeze in a bake.  Contemplated but I didn't want to break the tradition that I started only 1 year ago.  Like the previous year, I stayed away from creamy cakes simply because Pa was never fond of them.  Chose this fruit bake that I saw at Angie's.  Her photos were simply beautiful.


Angie used Damson plums, I bought a mixture of 2 types of plums that were available in the wet market on that day. I love how it turned out looking so pretty.   It was heavily loaded with plums, all beautifully arranged in circles, it was almost a pity to cover them with streusel.   It smelled so wonderful even when it was still in the oven.  

The taste?   If you like a fruity bake, you would love this one.  The fragrance from the plums itself was already captivating.   Every bite is laden with thick plum slices. The cake was infused with the juice that flowed from the plums.  The streusel toppings gave a crunchy finish to the cake.

All in all, it was a choice well made, a great looking cake with a taste to match which was also a taste of something new to the family.

Hop over to Angie's for the recipe.
   

Friday 14 October 2011

Calling Coffee Lovers


If you are a coffee lover, I am 101% (possibly higher) sure you would love this! By far, this is the best coffee muffin that I've ever had.  Try it out, no regrets guaranteed, yes that's how confident I am of this one :)


The muffins turned out pretty, with a nice dome (2 different types, 1 rounded while the other was pointed, read on to know why) and the crust at the top layer was fine but crisp to the effect of melt in the mouth.  The muffin was very soft and moist, bursting with coffee aroma to please the coffee addict that I am.  It was that good! I am so happy I found this recipe.  Credits to Helen, the owner of the recipe  who  mentioned it took her some effort to fine tune the recipe to perfection.


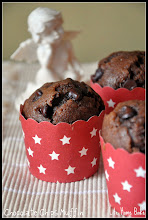
I made 2 variations with the batter.  The ones in green with white polka dots muffin case had a teaspoon of Kaya in them (I got the idea from Happy Home Baking, something that I came across sometime ago but could never forget) while the pink with red polka dots ones had cranberries plus a little brown sugar as toppings.  I thought the adding of Kaya was a very creative idea (think having coffee with a piece of toast with kaya (coconut milk) spread, yummy right?)  They are both delightful.


The little patch in the centre is the Kaya spread.


Recipe 
Source : Eepoh.com


* Notes : My variations in red
  • 100g butter
  • 50g castor sugar (70g brown sugar)
  • 50g icing sugar (30g icing sugar)
  • 2 medium eggs (1 1/2 extra large eggs - the only type I have at home)
  • 80g yogurt
  • 1 tbsp whipping cream (optional.. but then the muffin texture is better if added)
  • 135g all-purpose flour (Cake Flour)
  • 1/4  tsp baking soda (not baking powder)
  • 1/4 tsp salt
  • 1 - 2 tsp cinnammon (3/4 tsp, afraid it would overshadow the coffee aroma)
  • 1 tsp vanilla essence
  • 1 tsp butter essence (omitted)
  • 1 to 1 1/4  tbsp instant coffee (I use Nescafe Classic) mix with 1 tbsp hot water. 

Steps


  1. Beat butter and sugar until light and fluffy.
  2. Gradually add the eggs, vanilla/butter essence and coffee mixture. Beat mixture to combine well.
  3. Sieve flour, baking soda, cinnamon and salt.
  4. Add half the flour mixture into butter-egg mixture. Fold in.
  5. Add yogurt and whipping cream. Fold in.
  6. Add the remaining flour mixture and fold in.
  7. Spoon mixture into muffin cups and bake in preheated oven at 180C for 25 mins (baked at 200C, anything lesser doesn't give me a bloom, probably happens to my oven only).
If you like to try them with some Kaya, fill the cup with half the batter, put in a teaspoon of kaya and continue to fill up the cup.

For cranberry toppings, scatter some dried cranberries on top followed with a little brown sugar.

Wednesday 12 October 2011

Cheeky Meals


Did you smile at the little 'chick' up there?? I hope so, it looks kinda cute nestled in its nest doesn't it?  This was another fun lunch that I made for little one.  I first saw it at Angie's blog.  Angie, if you happen to stop by, thank you for the beautiful photos that captivated me and also the simple and doable recipe.  I added a little 'chick' to fill the nest to make it less lonely maybe? :)

Making this was easy, all it took was 30 minutes minus cutting the beaks and crest for the chicks, but that was all for the fun of it.  I intended for them to be little birds but little one said they look like chicks, so chicks they will be :)


"Here, meet my brothers and sisters! There are 7 of us altogether!"

"Oh, did i tell you there's another 2 of us who are soundly asleep in their cosy shells still? Hmm, maybe I should wake them up!"


Recipe
Source : Angie's Recipe

Note : Variations in red
  • 200 g Spaghetti
  • 3 tbsp Parmesan, grated
  • 2 tbsp Breadcrumbs
  • 2 Large eggs
  • 3 tbsp Whipping cream
  • 1 Tomato, diced
  • 50 g Prosciutto, diced  (ham)
  • 125 g Fresh Mozzarella cheese, diced
  • 3 tbsp Chives, chopped (1 stalk of celery, diced)
  • Salt and pepper
  • Served with some tomato sauce 
  • Quails Eggs, Lettuce
  1. Cook pasta in large pot of boiling salted water until al dente, according to pack instructions. Drain pasta. Return to same pot and toss with grated Parmesan and breadcrumbs.
  2. Use a fork to stick into the spaghetti and bring up a heaping forkful. Turn and twist the pasta to form a nest. Repeat until you have 8 nests (or according to preferred nest size). Place them on a baking tray lined with paper. At the same time, preheat the oven to 200C/400F
  3. Stir together the eggs and cream until just blended. Season to taste. Add in diced tomatoes, ham, Mozzarella, and chopped chives  (or any other greens). Divide the mixture and spoon them in the center of each nest. Bake the spaghetti nests on second rack from the bottom of the oven for 15-18 minutes (I baked mine for 12 minutes only, dependent on oven heat and I preferred it slightly wet).

Sunday 9 October 2011

Matcha Marble Chiffon Cake


What do you think of this cake? Pretty? I thought so when I saw it at Cosy Bake.   After baking one myself, I couldn't agree more and it tasted so good.   It's so soft and cottony and the intensity of the green tea scent and flavour felt just right when blended with the plain chiffon.  I don't mind green tea but being a coffee person,  green tea flavoured stuff didn't attract me too much (before this).   But I found myself loving this so much, I may end up being a convert.  It was so good I made it twice to share with friends.


It was fun trying to create the swirls.  For this one, I put dollops of the green batter at different layers and use a knife to create the swirls at each layer and finally gave the pan a few turns after everything was in.

This is a shot from the second cake that I baked.   The swirls are slightly different from the first one.  I had more green batter at the bottom and used a knife to create the swirls only after filling the pan with all the batter.  Confession, the primary motivation to make this one was to have another go at the swirls,  sharing came in convenient :))


My only comment is this cake is very delicate, i was tempted to reduce the amount of water by 10% probably.  Then again mine might be softer because I put in all the egg yolks when the recipe called for 3 only :)  Delicate is nice but delicate to the extend that it difficult getting it to stand on its own makes handling a little difficult and there's no sponginess to it?

Hmm, maybe i should find another excuse to give it another attempt...

Recipe
Source : Cosy Bake

* Note : Wordings in red denote my variations from the original

Ingredients
  • Top Flour   90g (Cake Flour)
  • Baking powder   2/3 tsp
  • Castor sugar   40g
  • Egg Yolks   3 (used 4)
  • Salad oil   40g (Canola Oil)
  • Water   90ml
  • Egg Whites  4
  • Castor sugar   40g
  • Matcha powder   1tbsp
  • Water   2tsp

Method
  1. Sift flour and baking powder and set aside. (Sift twice)
  2. Mix matcha powder with 2tsp of water to make a paste.
  3. In a bowl, mix yolks, oil and water together. Add in sugar, followed by the flour. Mix to a thick batter.
  4. Whip egg white till foamy and slowly add in sugar and whip until stiff peaks.
  5. Mix 1/3 of white to the flour batter and blend well. Fold the rest of the egg white in and fold them gently till well blended.
  6. Take 1/4 portion of the batter to mix with the matcha paste. Fill the chiffon tin with plain batter and in between layer filled with matcha batter. With a skewer, run through the tin to create the marble effect.
  7. Bake the cake at 180ç for 10 minutes, and bring down to 160'c and bake for further 30 minutes. (Bake at 180C for 45 minutes (cover top with aluminium foil).  After 45 minutes, remove foil bake for another 10 minutes)
  8. Cool the cake with the tin inverted on a wire rack till it's completely cool before slicing.

Wednesday 5 October 2011

Flowery Meals


I was reminded of the specialties at a famous Shanghainese restaurant in town when I saw these flower buns at Terri's blog, which I stumbled upon because of her participation in an event organised by Royal Selangor Pewter.   We frequently ordered them (instead of rice) to go with their other specialties like Sour Plum Sauce Chicken, Tung Po Meat and Sze Chuan eggplant.

My flower buns may not look so perfect but I am pretty pleased with them :)  They taste equally good too.   It has a nice soft texture that was a little chewy when eaten.  It reminded me of those that my Ah Mah used to make, unlike some of the commercial ones that one gets these day, which can be dry and crumbly.  I used my breadmaker to do the kneading.  The dough turned out to be one smooth ball that was easy to handle and shape.  I think I have found a simple and nice pau recipe that I will stick to.

I made Sour Plum Chicken to go with the flower buns.  The slightly crispy chicken  and its tangy sauce went well with the flower buns.     I added some canned pineapples chunks left over from making hawaiian pizza. Actually, I think anything with a good sauce/gravy, be it sour, sweet, savoury or spicy would go well with the buns (We ate them with Fish Curry for dinner to finish up all of them :) )


I am keeping the recipe here for my own reference, if any of you are interested to try this out, do hop over to Terri's blog for a more detail step by step instruction.

Flower Buns (makes 10 large or 15 to 18 small buns)
Source A Daily Obsession

* Note : Wordings in red denote my variations from the original

Ingredients


A Ingredients
  • 1 tsp dry yeast
  • 2 Tbsp water -Mix A ingredients together
B Ingredients
  • 350g Bao or HK flour or Rose (plain) flour (All purpose flour)
  • 1 tsp double-action baking powder
  • 50g (or less, say 30 g) fine sugar (35g fine sugar)
  • 200-250 ml water (250ml without and omitted water in A Ingredients)
  • 1 Tbsp shortening or vegetable oil (shortening)
*If you use 250 ml and you are kneading by hand, add 200 ml first and knead in the remainder slowly, 10 to 15 ml each time, so that the dough is not too sticky to handle.
  1. Sift the flour and baking powder together . If using shortening, rub it into the flour evenly.
  2. Mix A with all the B ingredients in a mixer bowl and knead at medium speed till very smooth, about 6-8 minutes. The dough should be quite soft. Never mind if it's slighty sticky. Continue kneading until it isn't sticky. If kneading with hands, put dough back into the bowl and cover with a cloth. Rest for 30 min or until doubled, depending on room temperature. (Put all ingredients A & B in breadmaker, starting with wet ingredients followed by dry with yeast last)
  3. Divide dough into 50g portions for larger buns or into golf-ball portions for dainty buns.  Dust your hands and the work surface lightly with some flour. (30g portions, need no dusting)
  4. Flatten each ball, roll into a small oval shape as long as your hand and about 3 to 4 cm wide. Use a metal pastry cutter and cut the dough into thin strips of 1/2 cm, thinner than that if you are making mini buns.
  5. Brush the cut strips of dough with veggie oil (Olive oil, spring onions and toasted sesame seeds)
  6. Take the ends of the dough, one end in each hand, and twist around your thumb and tips of your forefinger.Stretch the dough by pulling gently as you twist it around the tips of your thumb and forefinger. Tuck the end underneath the bun by pulling the last bit down to meet the other end that's at the bottom. (Sounds difficult? Don't read, just watch this video)
  7. Place the buns on a small square of baking paper to proof. Let the buns proof for 30-45 minutes or until doubled. Do not overprove or buns will wrinkle when steamed.
  8. Steam at high heat for 4 minutes for small buns, 5 to 6 minutes for larger buns. A bamboo steamer basket gives best results because the steam can escape instead of dripping onto the buns and messing them.

Sour Plum Sauce Chicken

  • 3 free range chicken whole thighs
  • 1 clove of garlic, chopped
Marinade
  • 1 tbsp light soy sauce
  • 1 tbsp Shaoxing wine
  • 1 tbsp cornflour
Sauce (Mix all ingredients)
  • 100ml water
  • 4 tbsp plum sauce
  • 1 tablespoon sugar
  1. Deskin, debone and cut chicken into bite size.  
  2. Marinade chicken with seasonings for 30 minutes.
  3. Fry chicken with minimum oil.
  4. Stir fry chopped garlic. 
  5. Pour in sauce ingredient.
  6. When sauce thickens, add in chicken and coat well.  
  7. Lastly, add in some pineapple chunks if preferred.

Before I end, I take this opportunity to wish good luck to Terri and all the other participants of the Royal Selangor 30-day ‘Get Your Jelly On’ challenge in aid of breast cancer awareness!   Do hop over to their blogs and lend your support not only to them but also for the cause of the challenge! Let's do what we can, cheers 

Monday 3 October 2011

Dragon's Eyes aka Longan Muffins


Dragon Eyes, the literal translation for the name of a small brown, juicy exotic fruit from the lands of Asia, known as Longan in Chinese.  It is so named because the fruit when shelled, resembles an eyeball (the black seed shows through the translucent flesh like a pupil/iris).  

The Chinese believe there is medicinal values in longans.  We eat them fresh and in dried form too.  In its freshest form, its flesh is sweet and juicy.  In its dried form, they are mostly used as ingredients and boiled to become  drinks, soups or desserts.  I thought the idea of using them in bakes was interesting.  The first time I came across them in bakes was when  Lavender Bakery introduced their Longan cupcake.   The longan aroma was prominent and it was slightly chewy.  I used to buy them for little one.   I searched around for a something similar and found a few.  I followed a longan muffin recipe.  The recipe looks pretty simple.  Just like any muffin recipe, it was mix wet ingredients with dry ones.


Verdict?


The batter was a little runny, which is quite unlike muffin batters that I am used to.  I was a little intimidated by the runny batter which saw me scrutinizing the recipe again to see if I got my measurements wrong, which I did not.  However, they rose well and was quite flavorful coming from the longan juice ( water used for soaking the longans) and the longan flesh.   I threw in some sunflower seeds to add an extra crunch.  I am not too sure if I did anything wrong but it was not up to my expectations.  There are spots which are dense, probably I overmixed it.  Gosh, I hate those air tunnels !!


Share

Twitter Delicious Facebook Digg Stumbleupon Favorites More