Advertisement 300 X 250

Girls' Best Friend

Bright and sparkly. Gemstones came to my mind when I was removing this Dragon Fruit and Orange jelly from the mould. Like a combination of gemstones...rubies, amber and diamonds, all in one!

Dragon's Eyes

The literal translation for the name of a small brown, juicy exotic fruit from the lands of Asia, known as Longan in Chinese, packed into these muffins

Nostalgia

A taste from the humble beginnings, the Long Bean Rice brings back beautiful memories of the yesteryears

Light and Fluffy

Lemon, Yogurt and Cranberries~a nice blend of flavours in a light and fluffy chiffon cake

Bread Stories

Asian style buns ~ Popular as breakfast food or snack, sweet/savoury fillings wrapped in soft, cottony bread

Showing posts with label Buns. Show all posts

Friday, 20 June 2014

Bread Basics~ Buns with Chicken Floss

Here's another variation from a basic bun recipe that i love using.   I have been using this same recipe for so many times that it comes naturally without having to make any reference.  Sounds boring? Hey, but they say repetition is the root of many great things like perfection, reputation, fashion, believe etc, etc, etc! 

I remember going crazy about chicken floss buns.  These buns were made popular by a particular bakery chain in Singapore.  At that time before the bakery chain hit our shores, hubs will bring some back occasionally when he goes down south to Singapore on business.  They don't come cheap though when we take the currency exchange into consideration, roughly around RM4 per bun at that time.  Now that they are in town, they are not any cheaper though.  So, the best brand is still in the house, cheaper and filled to the brim with floss :))

It really is something achievable at home.  All it takes is a good milk bun as the base, spread on some condensed milk/mayonnaise before wrapping/topping it with some chicken/pork floss.  I like doing it both ways, wrap some floss into the buns before baking then top them with more floss when they are out of the oven.  That way you get a double dose of floss and it makes the buns so, so tasty!

Bread Dough recipe here

Chicken Floss Buns

Ingredients
  • Chicken/Pork Floss
  • Condensed Milk/Mayonnaise 
Method
  1. Divide dough into 70g portions.  Set aside and let dough rest for 10 minutes. 
  2. Flatten dough then spread on a thin layer of condensed milk. Sprinkle a layer of chicken floss then roll it up and seal the seams tightly.
  3. Arrange on greased tray.
  4. Cover and rest buns until double the size again.
  5. Glaze with egg mixture (refer Part D of bread recipe) or if fresh milk mixed with water on 1:1 ratio. 
  6. Bake in a preheated oven at 180C for 17 minutes until golden brown.
  7. Remove buns from tray and let them cool on a wire rack.
  8. When buns are cooled, make a cut in the centre of the bun.  Spread on some condensed milk into the slit and on top of the bun.  Sprinkle more floss to coat the buns.

Thursday, 29 May 2014

Bread Basics ~ Buns


I am going back to the basics these days (plain laziness in disguise actually) when it comes to bread making.  Instead of trying out the more sophisticated methods, i went back to good straight dough method recipes.  I shared a  simple straight dough method milk loaf recipe recently and this one here is a recipe from Chef Alan Ooi for making buns which i use regularly.  Once you get the dough right you are on a roll, fill them as you wish.

If you are new to bread making, this could be the recipe to try. Easy and not too big lest you mess up and feel guilty about the wastage. A recipe that is just nice for a small/medium size family like mine. With 300g of flour, it yields around 10 53-55g buns which is enough for my family over 2 days.

This one here has some butter and cheese wrapped in it with cheese toppings too.  When the cheese inside melts, it will cause the top to cave in and look wrinkled which i find kinda cute :)

Beautiful soft texture from a simple method.  Good enough for something homemade, don't you think?

I apportioned out the dough for 6 butter cheese buns and turned the rest into 3 of these.  I was being adventurous instead of the usual pair of raisins and cinnamon, i paired it with candied nutmeg strips. I have tried adding nutmeg strips in cakes and i found that i like them a lot so i decided to try it out with buns.  Call me bias but i swear by Penang nutmegs specifically the Bell brand ones, i have tried another but they turned out looking bluish after baking which made them look gross and i stayed away thereafter.  

I took a cue from a William Sonoma's classic cinnamon buns that i saw a few of my blogger friends made for a Bake Along event.  I adapted the sticky sugary glaze which i tend to leave when making cinnamon rolls.  This glaze was applied on the pan before putting the bread dough into the pan.


Just a few strips of nutmeg here and there, aromatic, sticky sweet and spicy all in one.  A word of caution though they say nutmeg can cause hallucinations for some :))

Bread Dough recipe here

Butter Cheese Buns

Ingredients
  • 6 slices of cheddars cheese, cut into small strips
  • 6 small 1/2 inch cube of butter
  • 3 tsp sugar
Method
  1. Take a portion of dough that has been previously shaped into a ball.
  2. Flatten dough then wrap in cheese strips from 1/2 slice of cheddar cheese, a cube of butter and 1/2 tsp sugar.
  3. Arrange on grease tray or place in paper liners.
  4. Cover and rest buns until double the size again.
  5. Glaze with egg mixture (refer Part D of bread recipe) then top with cheese strips from the other 1/2 piece of cheddar cheese. 
  6. Bake in a preheated oven at 180C for 15 minutes until golden brown.
Nutmeg cinnamon buns
Reference for Syrup Paste/Cinnamon Sugar: Her Frozen Wings

Ingredients
Syrup paste
  • 30gm brown sugar
  • 20gm melted butter
  • 3 tbsp golden syrup/ light corn syrup
Method
  1. Mix the sugar, melted butter and the syrup together to a smooth paste. 
  2. Scoop or pour into the base of the baking tin, spread over. Set aside.
Cinnamon sugar
Ingredients
  • 1/4 cup of sugar mix with 1tsp ground cinnamon
  • 6 tsbp nutmeg strips
  •  Soften butter
Method to make buns
  1. Take a portion of dough and roll it into a flat rectangular.
  2. Brush with some butter and sprinkle the dough with cinnamon sugar mixture and top with 2 tbsp nutmeg strips. 
  3. Starting at short edge, roll the dough tightly into a cylinder. Cut the cylinder into 3 pieces and place them into the prepared baking tin. Cover and let the dough rise until double.
  4. Preheat the oven  to 180C, brush the rolls with some melted butter, bake for about 15 mins, place a wire rack over each pan and invert the rolls. Let cool.
This post is linked to the event, Little Thumbs Up organised by Zoe of Bake for Happy Kids and Doreen from My little favourite DIY, hosted by Tze of Awayofmind Bakery House.

Photobucket

Other buns using the same recipe

Apple Buns - recipe here

Kaya Cheese Buns - recipe here

Friday, 18 April 2014

Oriental Easter Bunny

As Good Friday begins may,
Mercy, Peace and Love be yours in Abundance ~ Jude 1:2

Bunny shaped steamed buns (or Pao in Chinese) to give it an oriental Easter mood.  It doesn't look exactly like a bunny since the ears are a bit pointy, unfortunately :(


I have made these soft and fluffy steamed buns quite a few times already with this recipe from Wendy.   You can leave them empty but i chose to fill them with some peanut butter that i needed to finish off asap.  With medium high heat, you could get some flowy peanut butter in the buns but if it's too high or re-steamed it tends to dry out.  If you leave it empty you could even eat it with some savoury dishes.

I substituted shortening with oil this time around and based on the results i think it actually taste better with shortening.

Happy Easter!


Recipe 
Source : Table for 2 or more... (this is 1/2 the portion which gave me 16 buns of around 40g each)

Ingredients
  • 250gm pau flour (cake flour)
  • 125gm steamed orange sweet potato
  • 50gm sugar
  • 1/2 Tbsp double action baking powder
  • 1/4 tsp salt
  • 20gm shortening, melted (30ml vegetable oil)
  • 6gm yeast 
  • 1/4 tsp sugar
  • 75ml water (start with 75ml, it depends on how moist the sweet potatoes are, mine needed 100ml water)
Method
  1. Proof yeast with 1/4 tsp sugar and water until it froths.
  2. Mix flour, baking powder, sugar and salt together. 
  3. Knead in steamed sweet potatoes. 
  4. Flour mixture will look crumbly. 
  5. Pour in frothy yeast mixture and combine to form a dough. Knead until dough no longer sticky and turns smooth. 
  6. Add more flour if it's too sticky or more water(by the teaspoon) if it's way too dry, (if unable to gather all the flour into a dough).  
  7. When dough is smooth, knead in melted shortening, until dough no longer feels oily.
  8. Leave to proof until double, about an hour.
  9. Punch down and knead for another minute. Divide dough into 40gm pieces, and shape as preferred.   
  10. Leave to proof until shaped bun doubles. 
  11. Steam on high heat for 12-15 minutes. (10 minutes)
Notes
  1. If like me, you are using a machine to knead, skip steps 1-7 but follow through step 6.  I used my breadmaker to knead the dough, I put everything in the recommended order, i.e. liquid (water, melted shortening), sugar, salt, followed by flour (sifted and mix with baking powder), mashed sweet potato and lastly yeast.  
  2. To make bunnies, form dough into oval shape.  Flatten with a rolling pin then add in 1 tsp of filling if using.  Pinch and seal well.  Just before putting them to steam, use a pair of kitchen shears to make a cut for the ears.  Use a toothpick dipped with some red food gel to make 2 dots for the eyes. 

Wednesday, 2 April 2014

Stack It Your Way!


Watching Jamie Oliver's Food Revolution has in some way influenced my son's eating habits, in a good way that is which i am thankful.  I guess it's always much easier for stars to get a message across to these children than their nagging mums :)  He was shocked to know how much sugar went into flavored milk and what kind of meat was used to make burgers in some fast food joints.  

It was school holidays last week and son asked if he could have burgers on one of the days with homemade patties and buns. And preferably how Jamie Oliver would have made them, he added! Now look who's doing the challenging these days!

I followed what Jamie named as basic burger recipe, according to him it's possible to add in more herbs and spice once this basic recipe is mastered.  It's interesting to note that the recipe calls for cream crackers to give the patties a crunch.  I substituted with wholemeal crackers instead as i didn't have any of those.  Since the recipe calls for minimum seasoning, you taste the actual flavors from the beef instead.

As for the buns, i used a sweet bun recipe that i am familiar with. We stacked our burgers to our hearts content, lettuce, carrots, cabbage, tomatoes, avocados and topped it with a grilled portobello mushroom with melted cheese on top :)


Suffice to say my young man had 3 of these in a row, mum had one though she wouldn't mind having another :)

Recipe - Patties
Source: JamieOliver.com
  • 12 Jacob's cream crackers (Wholemeal crackers)
  • 8 sprigs of fresh flat-leaf parsley
  • 500 g quality minced beef
  • 1 large free-range egg
  • Sea salt
  • Freshly ground black pepper
  • Olive oil
Method
  1. Wrap the crackers in a tea towel and smash until fine, breaking up any big bits with your hands, and put them into a large bowl (Place crackers in a ziploc bag, press with hands and a rolling pin to smash them until fine).
  2. Finely chop the parsley, including the stalks. Add the parsley, mustard, if using, and minced beef to the bowl. Crack in the egg and add a good pinch of salt and pepper.
  3. With clean hands, scrunch and mix everything up well. Divide into 6 and pat and mould each piece into a roundish shape about 2cm thick. (Divided according to size of my buns, enough for 9 buns) 
  4. Drizzle the patties with oil, put on a plate, cover and place in the fridge until needed (this helps them to firm up).
  5. To fry patties, preheat a large griddle or frying pan for about 4 minutes on a high heat prior. Turn the heat down to medium.
  6. Place the patties on the griddle or in the pan and use a spatula to lightly press down on them, making sure the patties are in full contact. Cook them to your liking for 3 or 4 minutes on each side.
Recipe for buns here.
Note: Reduced sugar to 40g.

To make hamburgers
  1. Cut buns into half, spread on some butter and place on griddle for a 1 minute.  
  2. Stack bun with a choice of lettuce, shredded carrot/cabbages, tomato slices, avocado slices and grilled portobellos.
  3. Add on dressings like mayonnaise, mustard or tomato/chilli sauce if preferred.
I'm linking this post to Cook Like a Star, an event co-hosted by Zoe of Bake for Happy Kids, Joyce of Kitchen Flavours and Mich of Piece of Cake.

Photobucket

Thursday, 6 March 2014

Richness...wrapped in a bun


Rich is Kaya in the Malay language and strangely it is also what we called a local jam made with coconut milk, eggs and sugar, probably it got its name from the 'richness' in the jam.  It's interesting to note that it is also known as Kaya in the Chinese dialects spoken here :)

Kaya toast has long been (and still is) a popular Malaysian (and Singaporean too i think) breakfast item.  It is said that it has its origins back to the days when the Hainanese worked as kitchen hands on British ships.   Some of them started their own business of opening coffee shops selling similar food that they prepared for the British when they settled down.  Instead of western jams they served toast with kaya.  A thin slice of cold butter is also slathered in to give it a sweet savoury taste.  If this is something new to you, don't give this a miss when you are around this part of the world.   Sheer heaven, i promise!

Now, what you are seeing here is not exactly the kaya toast that i have just mentioned.   These are buns but with kaya in them instead.  That green belt that they have around them is a pandan leave, it's not just to make the buns look pretty, it infuses its fragrance on the bun too.  The pandan fragrance blends very well with the kaya filling in the bun.


Instead of butter i played around and added a small piece of cheddar cheese on top of the kaya just before wrapping up the bun.  

Soft milky buns with a rich coconut jam infused with pandan fragrance...Mmmm!

Recipe
Source: Bread Magic by Alan Ooi for bread dough

Ingredients

Bread Dough

Part A
  • 300g high protein flour
  • 1/2 tsp salt
  • 1 1/2 tbsp milk powder
  • 50g sugar
Part B
  • 125ml water
  • 1 1/2 tsp instant yeast
  • 1 medium size egg (1 used 2/3 of a large egg and left 1/3 for glazing)
Part C
  • 40g butter
Part D (for glazing)
  • Mix 1 tablespoon fresh milk with 1/3 egg from Part B (I like using this as the glaze, it's not too glossy when egg is used solely or too matte and browns easily when only milk is used) 
Filling
  • Store bought kaya 
  • 1 slice of cheddar cheese, cut into small rectangular pieces
Method
  1. Combine ingredient A in a mixer and mix well.  Add in ingredient B and beat till a dough is formed.  Add in ingredient C and beat till dough is smooth and elastic to touch.
  2. Leave dough in a big bowl, covered with a damp cloth.
  3. Let it rise in a warm place until double the size.
  4. Divide dough into 50g portions (managed to get 11 pieces). 
  5. Flatten dough then wrap with some filling starting with 1 tablespoon of kaya followed by a piece of cheese. It's easier to wrap if it's not too full. 
  6. Arrange on greased tray if not using paper liners.
  7. Cover and rest buns until double the size again.
  8. Wrap a pandan leave around the bun (loosely)
  9. Glaze with Part D.
  10. Bake in a preheated oven at 180C for 15-17 minutes until golden brown.

Note: I combine all the ingredients and let my breadmaker handle steps 1-3.

Tuesday, 25 February 2014

A Sweet Treat of Hong Kong ~ Pai Pau


If one were to stroll along the streets in Hong Kong, one is bound to come across glass cupboards that are filled with a wide range of Hong Kong style pastries.  These cupboards are commonly placed near the entrance to the many cafes, restaurants or bakeries, making it convenient for customers who choose to grab a bite on the go instead of dining in.  Snacking is quite a culture there.  Well, of course looking won't do both you and them justice! Pick a traditional cha chaan teng (aka tea restaurants), order a few of these pastries and a cup of milk tea to go with them for a true Hong Kong experience :)

Chinese pastries with British influence is one of the must try food when one visits Hong Kong.  Among them egg tarts, pineapple buns, cocktail buns and pai pau. 

Pai Pau literally translates to row buns just like how they are made longish and baked closely together in a row.  Nothing big to shout about, these are typical Asian style plain sweet buns but they are cottony soft, creamy and milky.  You could eat them just like that which is how i prefer them.

If you look at the recipe, it's a no brainer why these buns are so soft, creamy and milky.  4 types of milk goes into it, cream, fresh milk, powdered milk and condensed milk!  Pretty high in fat content, huh?  I have made them on rare occasions only, mostly when i am trying to finish off some cream.  And for this time around, the other reason would be to support the Asian Food Fest blogging event, featuring Hong Kong and Macau for this month.


Recipe
Reference: Do What I Like

Ingredients
  • 250g bread flour
  • 1/2 tsp salt
  • 5g instant yeast
  • 2 tbsp powdered milk
  • 45g sugar
  • 1 egg yolk + milk to make up 120ml
  • 75ml whipping cream
  • 1 tbsp condensed milk
  • 50g pre fermented dough
  • 40g butter 
Method
  1. Place all ingredients in the bread pan of the breadmaker (according to the recommended sequence stated in the instruction manual of the breadmaker).  Select Dough function.  Once the cycle completes, let dough rise until double the size.
  2. Remove from bread pan then punch down dough to release trapped air.  
  3. Divide dough into 6 portions (around 93g each).  Shape into round balls and let dough rest for 15 minutes.
  4. Roll out dough  into rectangular shape of around 18cm * 5 cm. Roll dough up from the long side.  
  5. Place in a greased pan (The size of my pan was 23 * 28 cm).  
  6. Let dough rise until length is around 80% of pan. (I covered the pan with a tray to prevent it from rising in height.)
  7. Brush with egg wash (I used the remaining egg white plus 1 tbsp of milk).
  8. Bake at 190C for 18 minutes. 
  9. Brush with some butter for a nice glossy look and let it cool on rack.
Pre fermented Dough
  • 63g bread flour
  • 40ml water
  • 1g instant yeast
  1. Mix all the dough into a rough dough and let if proof for at least 2 hours.
  2. The above amount will produce 100g of dough. 
  3. Wrapped up the remaining portion with cling wrap and freeze for future use.
  4. The frozen dough must be brought to room temperature before using.
Note:
I have incorporate my slight variations into the recipe above which include using a breadmaker to do the kneading and dividing the dough into 6 portions instead of 8 as recommended in the original recipe.

Updated on 27 Feb 14 - My apologies for missing out step 6 in the original post. 


I am submitting this post to Asian Food Fest: Hong Kong + Macau  hosted by Annie from Annielicious Food 

Thursday, 3 October 2013

It's All in the Honey


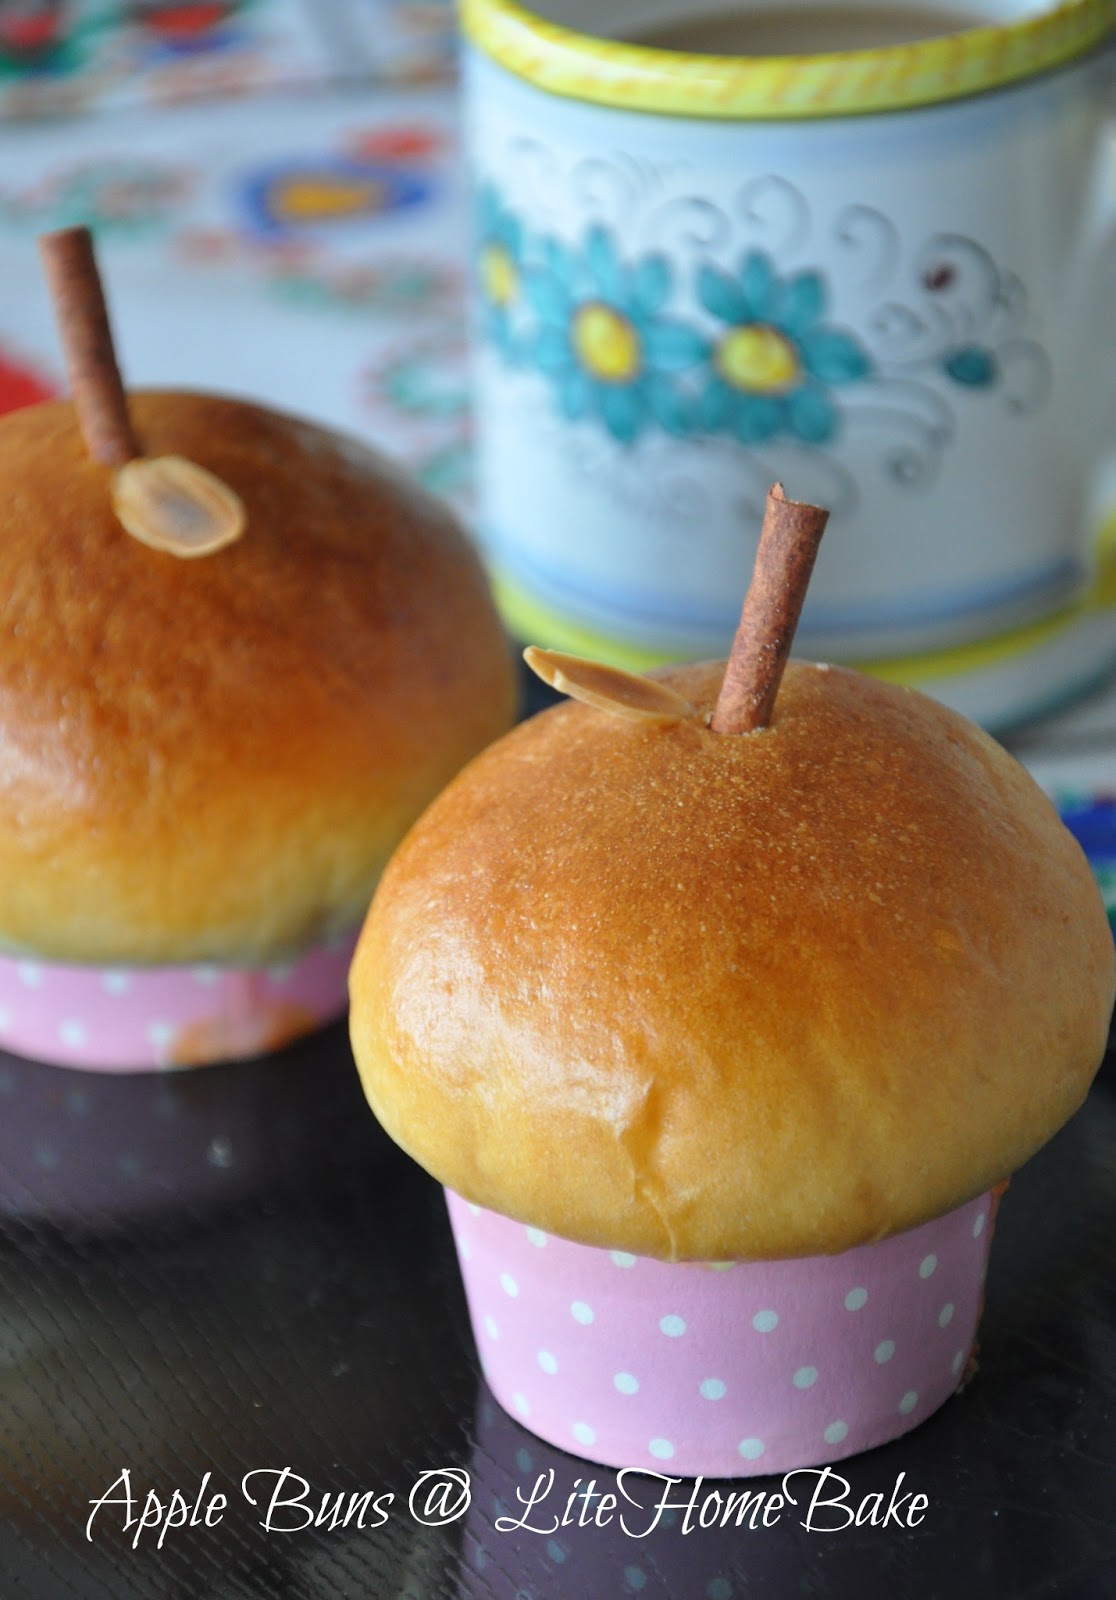
Although i try out new bread recipes every so often, there are a few that are close to heart (read easy, tasty and foolproof ones).   I always run back to these handful especially when time is running short, or i am not in the mood for experiments or cannot risk something going wrong (like when it happens, kid will have nothing for breakfast before going to school the next morning!)  And one of them is Honey Buns from Happy Home Baking, i tried this out in the very early stage of my breadmaking journey, and i remember being elated when it turned out beyond my expectation for a newbie.  No, i am not trying to blow my own trumpet, it was the recipe.  A very simple recipe (no tangzhong, no overnight sponge dough etc), breadmaker friendly yet it gave soft cottony buns like those that you get in kopitiams.  In fact it was even better because it has this nice sweet floral fragrance coming from the honey used.   I felt like i struck gold to have landed on that recipe :)  From then i came to a conclusion that it's all in the honey, honey is one ingredient that makes bread really soft.

This time around, i twigged this recipe a little.  I substituted 10% of the flour with black sesame powder and gave it a custard (or as they say in French Crème Pâtissière) filling too.  I love the outcome, the buns had a nice nutty fragrance on top of the sweet floral fragrance from the honey!  May sound a little overboard, but i thought it smelt a little luxurious, probably because of the type of honey used :))   It was already smelling good at the dough stage, it got better and better when it hit the oven, feeling happy i was!

And buns go spinning...pipe spirals on top of buns to use up all the custard after filling the buns with them.


And the very soft bread texture!


And with yummy custard filling.  You can choose not to fill them or do without the black sesame powder to get plain honey milk buns.   The plain ones go very well with some butter and kaya.  Try it and you will not regret, i promise!


Recipe

Ingredients

For Buns
Source : Happy Home Baking 
  • Honey Buns 
    • 300g bread flour (200g bread flour,100g AP Flour)  
  • Black Sesame Buns
    • 200g bread flour, 70g  AP Flour (add 1 or 2 tbsp of bread flour if dough is too wet)
    • 30g black sesame seeds (toasted and ground)
  • For both Honey and Black Sesame Buns
    • 4g (about 2/3 tsp) salt
    • 4g (1 tsp) instant yeast
    • 1 egg lightly beaten plus enough milk to make 200g
    • 50g honey
    • 30g unsalted butter
    For Custard
    Source : Corner Cafe  (half recipe)
    • 250ml milk
    • 1 egg
    • 1 egg yolk
    • 1/2 tsp vanilla extract
    • 55g caster sugar
    • 15g cornflour, 5g custard powder
    • A pinch of salt (if using unsalted butter or not using butter)
    • 25g butter (for additional shine and firmness)
    Steps 

    For Custard
    1. Whisk together whole egg, egg yolk, 30ml milk, sugar and vanilla.  Mix in flour, cornflour and salt if using.
    2. Bring the remaining milk just to the boil in a saucepan.  Pour the hot milk in small stream into the egg mixture, whisking constantly with a balloon whisk as you pour (very important).  Once incorporated, pour everything back into the saucepan.
    3. Whisk the mixture over medium heat until it thickens and firms up.  Remove from heat and whisk in butter if using.
    4. Pour the hot custard into a bowl and plunge the bottom of the bowl into another larger bowl of iced-water to cool, give it a whisk occasionally.  Once it reaches room temperature, cover the surface of custard with cling film to prevent a skin layer from forming. 
    5. Alternatively fill the custard into a piping bag, twist the open end to seal up the cream.  Refrigerate until ready to use.
    For Buns
    1. Place all ingredients in the bread pan of the breadmaker (according to the recommended sequence stated in the instruction manual of the breadmaker).  Select Dough function. Check on the dough after 5 minutes of kneading, add 1 to 2 tbsp of flour is it's too wet (i.e. sticks to the hand).  Once the cycle completes, remove dough from the bread pan. 
    2. Shape the dough into a smooth round and place in a bowl. Cover and let it rise till double in volume.
    3. Remove dough and give a few light kneading on a lightly floured work surface. Press out the trapped air as your knead. 
    4. For Honey Buns-Divide into 9 equal portions and shape them into rounds. For Black Sesame Buns (with custard filling)-Weigh 50g dough for each bun.  Cover with cling wrap, let the doughs rest for 10mins.
    5. Flatten each dough into a round disc and press out the trapped air. For Black Sesame Buns-Wrapped in a heaped tablespoon of custard.   Shape into a smooth round ball.
    6. Place doughs seams side down on a 20cm by 20cm square baking tray (lightly greased with oil or butter or line it with parchment paper) or place them in paper liners.  Loosely cover with a damp cloth or cling wrap and let doughs proof for 45 ~ 60 mins or until double in size.
    7. When ready to bake, brush the surface of the dough with milk.  For Black Sesame Buns-sprinkle a combination of black and white sesame seeds and pipe some custard on buns.
    8. Bake at preheated oven at 200C for about 15 ~ 20 mins until the bread is golden brown.  Cover the surface with a sheet of aluminum foil if the surface browns too quickly. Remove from oven, unmold (except those baked in paper liners) immediately and let cool on wire rack.

    Thursday, 29 August 2013

    Kampar Curry Chicken Bun


    One last post for MFF Perak.  This bun was made popular in Kampar hence the name Kampar Curry Chicken Bun.   The uniqueness of it is there is a curry chicken parcel wrapped inside the bun.  To eat it, one will have to tear/cut open the bun, unwrapped the parcel then dip the bun into the curry and eat it with the chicken.  I have made this a couple of times (and posted it too) and it's always very well received by family members and friends.   We usually have it for dinner.  


    I normally make it in portions for individual serving whereas for the real mccoy it is one giant bun with most probably half a chicken in it to be shared out.  Imagine the size of the bun!  To get an idea of it, do hop by my friend Lena's place.   The other difference is i like sprinkling toasted sesame seeds on the bun :) 


    A peak into the bun! Curry with soft, fluffy bun is just too tasty! 

    To make this, you need to cook chicken curry and wrapped them in sweet bread dough.   You can use your own favorite recipes for them but here I am sharing a speedy recipe for the curry and a bread dough recipe which one can either hand knead or use a breadmaker.

    Recipe
    Chicken Curry 

    Ingredients
    • 3 whole chicken legs cut into 6 pieces each 
    • 1/2 pack of chicken curry paste (I used A1 brand) 
    • 1 big onion sliced and grounded
    • 2 stalks lemon grass, bruised
    • 1 star anise
    • 1 cinnamon stick
    • Handful of curry leaves
    • 1 russet potato, cut in medium size cubes
    • 200ml water 
    • 50ml coconut milk
    • 2 tbsp cooking oil
    Method
    1. Heat up oil and fry onion until fragrant.  Add in curry paste and continue to fry until smells fragrant.  Add in spices.
    2. Add in chicken and mix well until chicken turns opaque.
    3. Pour in water and let it simmer until chicken is cooked.  Add in potatoes half way through in order not to overcook them.
    4. Add in coconut milk.

    Bread Dough
    Ingredients
    • 300g bread flour
    • 200g plain flour
    • 1 tsp salt
    • 50g sugar
    • 2 tsp instant yeast
    • 1 tbsp milk powder
    • 200ml water
    • 60g butter
    • 1 egg
    Method
    1. Combine all dry ingredients: flour, salt, sugar, milk powder and instant yeast in a bowl. Make a well in the center. Whisk and combine all wet ingredients: water and egg then add into the well of the dry ingredients. Knead until you get a dough shape and gluten has developed, then knead in the butter. Keep kneading until the dough is smooth, not sticky and elastic.  
    2. If  using a bread maker add all wet ingredients into bread maker first followed by dry ingredients. Add yeast the last.  Select Dough function.  Once the cycle completes, remove dough from the bread pan. 
    3. Shape the dough into a smooth round and place in a bowl. Cover and let it rise till double in volume.
    4. Punch out trapped air using knuckles.
    5. Divide into equal portions and shape into balls to make smaller buns or use whole if making one big bun.  (I managed to get 5 portions of 175g each).
    Assemble
    1. Wrap some chicken curry into a parcel with aluminium foil (I managed 3 pieces of chicken with 2 tsbp of potato cubes).
    2. Wrap the parcel with bread dough.
    3. Egg wash the buns and sprinkle some toasted sesame seeds on bun.
    4. Bake @ 180C in a preheated oven for 20 minutes till golden brown.


    I am submitting this post to Malaysian Food Fest Perak month hosted by 
    Photobucket

    Wednesday, 31 July 2013

    Just Applelicious

    Serving 2 applelicious treats in this post.  As they say an apple a day, keeps the doctor away, so 2 apples a day, keeps the doctor far far away?  Pretty sure most of us won't miss the doctor :)

    I love the smell of freshly baked apple treats as almost always they come coupled with sweet smelling cinnamon and that by itself is good enough to perk me up.  I am already on cloud nine when my kitchen is filled with its aroma :)

    These muffins were really good.  Super soft and moist, definitely above my expectations for muffins and on top of that it was wholewheat!  Smitten Kitchen (where the recipe was spotted) described it as crazy moist, so go figure!  They are easy to whip up and stores quite well too. A little reheating  is all it needs if you have extras to freeze that is.


    Note : The recipe below is for half the recipe and it gave me 7 muffins. I have also reduced the sugar and omitted granulated sugar.   Hit the source for the original recipe.

    Recipe
    Wholewheat Apple Muffins
    Source : Smitten Kitchen who adapted from King Arthur Flour

    Ingredients
    • 1/2 cup whole wheat flour
    • 1/2 cup all-purpose flour
    • 1/2 teaspoon baking powder
    • 1/2 teaspoon baking soda
    • 1/8 teaspoon salt
    • 1/2 tablespoon cinnamon
    • 55g unsalted butter, at room temperature 
    • 1/3 cup dark brown sugar, packed, divided 
    • 1/2 a large egg, lightly beaten
    • 1/2 cup buttermilk or yogurt (1tbsp lemon juice with fresh milk to make 1/2 cup and put aside for 5 minutes)
    • 1 large apple, peeled, cored, and coarsely chopped
    Method
    1. Preheat the oven to 450°F. Grease and flour 18 muffin cups and set aside. (I used 210C and paper liners.   Although 450 converts to 232, i find it rather high and was worried it will make the muffins dry)
    2. Mix together the flours, baking powder, baking soda, salt, and cinnamon, and set aside. 
    3. In a separate bowl, cream the butter and add half the amount of brown sugar. Beat until fluffy. Add the egg and mix well; stop once to scrape the sides and bottom of the bowl.Mix in the buttermilk gently. (If you over-mix, the buttermilk will cause the mixture to curdle.) Stir in the dry ingredients and fold in the apple chunks.
    4. Divide the batter evenly among the prepared muffin cups, sprinkling the remaining cup brown sugar on top. Bake for 10 minutes, turn the heat down to 400°F (I turned down to 190C), and bake for an additional 5 to 10 minutes, or until a toothpick inserted into the center of a muffin comes out clean. 
    5. Cool the muffins for 5 minutes in the tin, then turn them out onto a wire rack to cool completely.
    Don't like muffins? Or have room for more? How about this one?  This is another wonderful applecious treat.  Can't be more appley than apple looking buns with apple chunks and jam for fillings :)) These look cute don't they? I love the idea of using cinnamon stick as the stems, besides looking cute, it gave the buns an added cinnamony fragrance.    It was their cute appearance here that caught my interest.  I think they look more like apples from the top than the front.  From the front, they can pass off as mushrooms instead!  I should have used lesser dough to get a better apple shape, this one is a little heavy at the top.  I will also do away with the 'stem' and the 'leave' and put in a mushroom filling to make them mushroom buns, the next time :)


    I used a simple straight method bread dough but this recipe is a keeper.  The buns are soft (not as soft as the more sophisticated methods like tang zhong or those with starter doughs) but they are good enough (especially if you are feeling lazy or short of time).    I will let the photo below speak for itself... 


    As for the fillings, i spooned in a big heaped tablespoon of my apple jam and added some apple chunks and a small piece of cheddar cheese. 

    Recipe
    Apple Buns
    Source : Bread Magic by Alan Ooi for bread dough

    Ingredients

    Bread Dough

    Part A
    • 300g high protein flour
    • 1/2 tsp salt
    • 1 1/2 tbsp milk powder
    • 50g sugar
    Part B
    • 125ml water
    • 1 1/2 tsp instant yeast
    • 1 medium size egg (1 used 2/3 of a large egg and left 1/3 for glazing)
    Part C
    • 40g butter
    Part D (for glazing)
    • Mix 2 tablespoon fresh milk with 1/3 egg from Part B (I like using this as the glaze, it's not too glossy when egg is used solely or too matte and browns easily when only milk is used) 
    Filling
    • Apple Jam (recipe here)
    • 1 medium size apple, peeled, cored, and coarsely chopped
    • 1 slice of cheddar cheese, cut into small rectangular pieces

    Method

    1. Combine ingredient A in a mixer and mix well.  Add in ingredient B and beat till a dough is formed.  Add in ingredient C and beat till dough is smooth and elastic to touch.
    2. Leave dough in a big bowl, covered with a damp cloth.
    3. Let it rise in a warm place until double the size.
    4. Divide dough into 50g portions. (Will reduce to 40g the next time around)
    5. Flatten dough then wrap with some filling starting with 1 piece of cheese followed with 1 heaped tablespoon of jam and lastly some apple chunks. It's easier to wrap if it's not too full. 
    6. Arrange on greased tray if not using paper liners.
    7. Cover and rest buns until double the size again.
    8. Glaze with Part D, decorate with cinnamon stick and almond flake.
    9. Bake in a preheated oven at 180C for 15-17 minutes until golden brown.
    Note: I combine all the ingredients and let my breadmaker handle steps 1-3.


    Thursday, 15 November 2012

    Stop and Smell the Roses?


    A reminder to stop and smell the roses? You don't see a rose? I hope not, I hope the bun in the picture can passed off looking like a rose.  One with big fat yummy petals :))  They are sweet smelling though  :)

    Trips back from hometowns have always been bountiful, made these from some kampung grown bananas that Pa bought when he took little one for a ride on his old, trusty Hondacup. 

    Decided on steamed banana buns or known as mantaus in Chinese found on Wendy's blog to use up some leftover bananas after eating them on its own and making a chiffon cake.  You will find some uniquely shaped mantaus over there, a very pretty pink rose mantau and croissant shaped ones among them.   But I didn't follow her method to make these roses, hers are far prettier which  means a lot more effort required.  I gave it a pass and used a simpler method.

    I filled these buns with some peanut butter.  Had some fun shaping them.  Split between roses and the simpler proofing of round ones in tart pans.


    Verdict? The banana taste was quite mild.  Buns were soft and light.


    Note : Steps below are adaptions that i made to use my breadmaker for the kneading and it is also half the original recipe.

    Recipe
    Source : Table for 2 or more

    Ingredients
    • 150g bananas
    • 1/4 tsp baking soda
    • 250g all purpose flour
    • 1/4 tsp salt
    • 1/4 tbsp baking powder
    • 2 tbsp sugar
    • 35ml warm milk
    • 2 tsp instant yeast
    • 25g soften butter
    Steps
    1. Mash banana with fork and mix with baking soda.  Let it rest for at least 1 hour (Reason: To reduce acidity).
    2. Mix and dissolve yeast in warm milk. Set aside for 5 minutes then mix with bananas.
    3. Put all ingredients into breadmaker pan starting with liquid followed by sugar, butter, flour and yeast.
    4. Set to bread dough cycle.
    5. Let dough rise until doubled.
    6. Punch down and knead dough for awhile.
    7. Separate dough into 10 pieces of around 50g each.
    8. Let dough rest for 10 minutes.
    9. Shape dough as preferred. 
    10. For rose like shape, after flattening dough into round shape, cut dough to make quarters but do not cut until the intersections.  Put in a small blob of peanut butter in the centre then wrapped with opposite sides of dough to create layers. 
    11. Let dough rise until doubled again before steaming on high heat for 12 minutes.

    Tuesday, 7 August 2012

    Berrilicious Buns


    Been awhile since I made some buns.  One needs a fair bit of time on hand for bread making, what more buns where extra effort is needed for fillings and shaping too.  With the bonus of a public holiday following  a weekend, I took the opportunity to make (and blog about) these over  the weekend.

    I prepared the dough using the sponge dough method. This method yields bread that is soft but yet able to give a texture to the bite. Was undecided about the fillings when I started off.  

    I proof them in tart pans, love the fluted edge effect.  Price to pay to look pretty (yes, for buns too), pans need to be greased and don't forget the washing that comes with it!


    A peak into what's inside...fresh strawberries with cream cheese.   Probably, the thing running in your mind now would be "I don't see any strawberries..."  That was in my mind too when I split the bun as in "Hey, where did my strawberries go?"  Probably I cut them too small and they melted and blended into the cream cheese! Nevertheless, the taste and fragrance was evident.

    Another variation with cranberries instead of fresh strawberries in their fillings.


    Recipe
    Source : Bread Magic by Alan Ooi for dough, Mix and match for fillings

    Ingredients for bread dough 
    Part A
    • 200gm  bread flour
    • 1 tsp instant yeast
    • 1 tbsp sugar
    • 120 ml water 
    Part B
    • 150gm  bread flour
    • 60g sugar
    • 1 tsp salt
    • 2 tbsp milk powder
    • 1 tsp instant yeast
    • 1 egg
    • 50g butter
    Ingredients for fillings
    • 125 gm cream cheese
    • 50g sugar
    • Fresh strawberries/dried cranberries

    Methods for making bread dough
    1. Combine ingredients for Part A.  Mix until soft dough formed.  Leave dough covered in a bowl and let it proof for 2 to 3 hours.
    2. After 2/3 hours,  combine ingredients for Part B.  Add in dough from no. 1.  If dough appears dry, drizzle in a little water.  Mix and beat until dough is smooth and elastic to touch.
    3. Cover dough for 30 minutes in a warm place until it has doubled in size.
    4. Divide the dough into 40g portions and shape them into small balls and rest them for 5 minutes.
    5. Flatten dough portions, wrap in some filling.  Seal edges and place on a baking tray.
    6. Cover tray with damp cloth and proof till double the size.
    7. Bake in preheated oven at 180C for 15 minutes.


    Method of making fillings
    1. Combine cream cheese and sugar. 
    2. Beat with mixer.
    3. Divide into half, mix one part with strawberries and the other with dried cranberries.

    Saturday, 7 April 2012

    Hot Cross Buns with a Tropical Twist


    It has been awhile.  Happy that thoughts of giving this up are not harbouring in my mind still.   I hate half way jobs, but technically, there is no end to this is there? I am still making stuff for the family, that part I strive not to compromise.  At certain stages in life, it just gets tougher leaving one with lesser time for indulgence.  Time and again I remind myself that when the goings get tough, the tough gets going and I am not going to let myself be the weaker one..So, go, go, go it shall be for now!

    So, with Easter around the corner one sees, eats, bakes or come across mentions about Hot Cross Buns somewhere or another.  My earliest encounter of them would be Mum reading "Hot Cross Buns...one a penny, two a penny..." talk about lasting impressions that parents leave in their children... Then I got to know more interesting stories about these buns.  Traditionally eaten on Good Fridays and it dates back to ancient times... symbolic reminder for Christians of Christ's crucifixion ...and there are some superstitions around them too, like sharing them ensures continued friendship, kissing the cross before eating them...and one very interesting one that may intrigue bakers is if you hang one of these buns in the kitchen it will ensure all bread made year round will turn out perfectly!...maybe that's one to be considered... 

    I thought I would attempt these ancient buns...But then, I was craving for Coconut Buns not spiced buns with dried fruits.  For some reason memories of the Roti Man coming by on his motorbike with lots of bread hanging around a big metal box on the passenger seat reminded me of the coconut buns that Mum used to buy.  So, I ended up making more coconuts ones than spiced ones :)  So, here are my Hot Cross Buns with a tropical twist.  To be exact, they are actually coconuts buns but with a cross on them :)

    I used the Tang Zhong method (for bread dough recipe, refer here) added with a teaspoon of mixed spice.   As for the coconut filling, fry some shaved fresh coconut with palm sugar and rock sugar.  

    So, here's Hot Cross Buns with a tropical twist!


    Hmm, should I go with the cross or my green belt??


    Easter Blessings Everyone!

    Saturday, 19 November 2011

    When the Vikings come marching in...


    Steamed Buns are popular favourites among us Chinese for our breakfast. Typically they can divided into 2 categories, the round shaped ones with fillings in them are known as Pau while the non-filled ones, traditionally rolled in a log shape and cut into pieces before steaming are known as Mantau.   However, the line differentiating them has gone blurry, paus can come without fillings and vice versa for mantaus.  They come in various flavours and shapes never imagined too!  Like this one that I saw at Wendy's, a little like the Vikings' helmets to me,  I thought they look cute :)

    These steamed buns are not filled.  They had a nice sweet fragrance and natural sweetness from the sweet potatoes making them pleasing although eaten plain.  You can cut them up and spread some jam or dip them in gravy.

    Verdict? They were really yummy! They rose beautifully and were soft but chewy.  They stayed soft until the next day!  I saved half the portion in a ziplock after shaping them and steamed them for freshly steamed and piping hot buns the next morning.

    This was the first time I steamed them in a bamboo steamer basket which I have been planning to get for awhile.  I have read that they give the best  results for paus and other steam cakes.  After finding one the right size which I bought for RM30, I couldn't wait to try it out.   This basket sits on top of another pot of boiling water, steam then enters through the open slates at the bottom of the basket and contained in the basket by its lid.  Bamboo absorbs condensation ensuring water does not drip back onto the buns which allowed them to rise so beautifully without any crinkles! I love the effect, I am really convinced that these baskets do make a difference, well bought indeed!

    Take a closer look at these babies :)


    Recipe
    Source : Table for 2 or more... (this is 1/2 the portion which gave me roughly around 16 buns...can't remember exactly)


    • 250gm pau flour (cake flour)
    • 125gm steamed orange sweet potato
    • 50gm sugar
    • 1/2 Tbsp double action baking powder
    • 1/4 tsp salt
    • 20gm shortening, melted
    • 6gm yeast 
    • 1/4 tsp sugar
    • 75ml water
    If like me, you are using a machine to knead, skip steps 1-7 but follow through step 6.  I used my breadmaker to knead the dough, I put everything in the recommended order, i.e. liquid (water, melted shortening), sugar, salt, followed by flour (sifted and mix with baking powder), mashed sweet potato and lastly yeast.  


    1. Proof yeast with 1/4 tsp sugar and water until it froths.
    2. Mix flour, baking powder, sugar and salt together. 
    3. Knead in steamed sweet potatoes. 
    4. Flour mixture will look crumbly. 
    5. Pour in frothy yeast mixture and combine to form a dough. Knead until dough no longer sticky and turns smooth. 
    6. Add more flour if it's too sticky or more water(by the teaspoon) if it's way too dry, (if unable to gather all the flour into a dough).  
    7. When dough is smooth, knead in melted shortening, until dough no longer feels oily.
    8. Leave to proof until double, about an hour.
    9. Punch down and knead for another minute. Divide dough into 35gm pieces, and shape as u like.  For these helmets, roll the dough flat in a triangular shape, roll them up and pinch two ends together tightly to make sure they don't open up.  Hop over to Wendy's for a pictorial guide on how to shape.  Other easier methods would be making them into round balls or just rolling them up without trying to pull it into a triangular shape.  
    10. Leave to proof until shaped bun doubles. 
    11. Steam on high heat for 12-15 minutes.

    Share

    Twitter Delicious Facebook Digg Stumbleupon Favorites More