Advertisement 300 X 250

Girls' Best Friend

Bright and sparkly. Gemstones came to my mind when I was removing this Dragon Fruit and Orange jelly from the mould. Like a combination of gemstones...rubies, amber and diamonds, all in one!

Dragon's Eyes

The literal translation for the name of a small brown, juicy exotic fruit from the lands of Asia, known as Longan in Chinese, packed into these muffins

Nostalgia

A taste from the humble beginnings, the Long Bean Rice brings back beautiful memories of the yesteryears

Light and Fluffy

Lemon, Yogurt and Cranberries~a nice blend of flavours in a light and fluffy chiffon cake

Bread Stories

Asian style buns ~ Popular as breakfast food or snack, sweet/savoury fillings wrapped in soft, cottony bread

Showing posts with label Cheese. Show all posts

Saturday, 28 June 2014

Orange is the Happiest Color


It is not very often that i bake cheese cakes.  The problem is they keep calling out to me whenever they are in my fridge.   I love them so it's easier to refrain from baking than to refrain from eating! 

I had this block of cheese leftover after i made a cake for my son's class party, just the excuse for me to make myself one :)  I didn't have that much left, only 250g, so i thought a Japanese style cheese cake would suit it well.  And i was craving for something orangey. Orange is my favorite fruit and i like its bright sunshiny color. I must agree with Frank Sinatra to a certain extent, "Orange is the happiest color" so he said :)

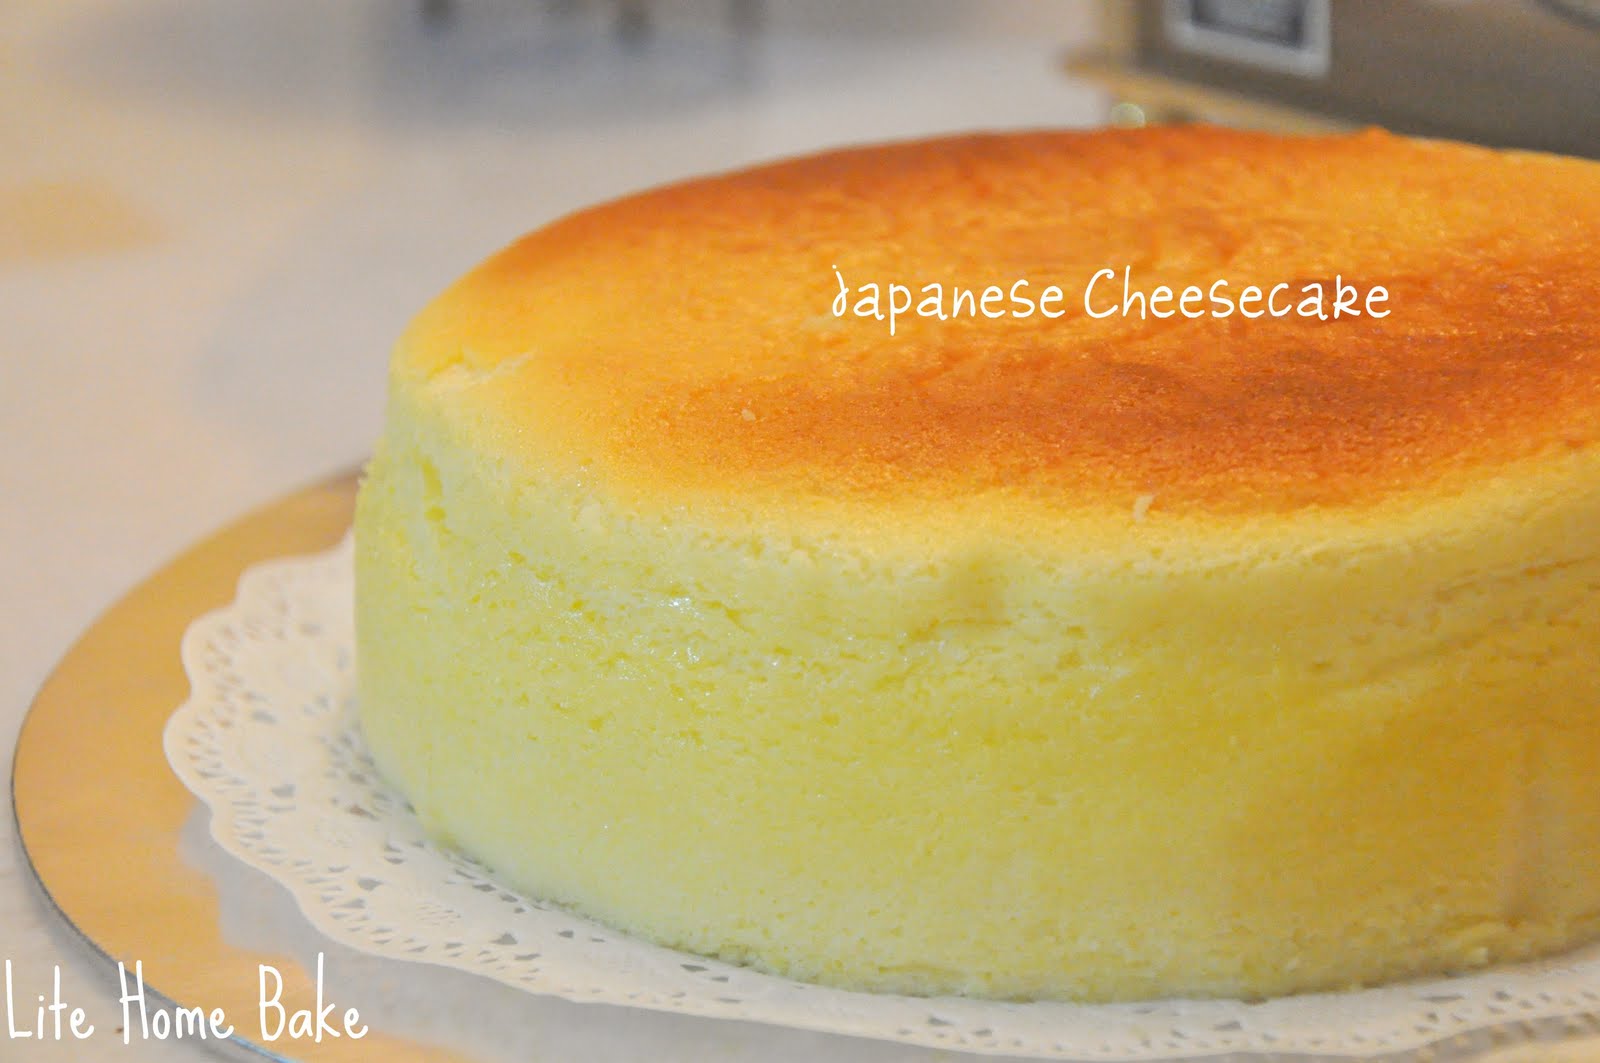
I did a search and landed on Ann's recipe which she posted in 2010. I know Ann bakes gorgeous stuff but when i saw this cake of hers, i was like 'wow' she was baking gorgeous cakes even way back then :)  I absolutely love this cake.  It has a very fine texture that was light and airy and the orangey tang is just heavenly for orange lovers like me.

 Light, airy and tangy!

I substituted corn flour with potato starch and i am wondering if it had a hand in making the cake lighter, hmm...any thoughts my friends?

Recipe
Reference: Anncoo Journal

(A)
  • 250gm Cream Cheese, soften
  • 250ml Milk
  • 120gm Butter
(B)
  • 50ml Fresh Orange Juice
  • 2 nos Orange Rind, grated (Zest from 1 big orange)
(C)
  • 6 nos Egg yolks (Medium size eggs)
  • 60gm Sugar
(D)
  • 70gm Cake / Plain Flour
  • 20gm Corn Flour (Potato Starch)
(E)
  • 6 nos Egg Whites
  • 1/2 tsp Cream of Tartar (omitted)
  • 60 gm Sugar
Method
  1. Melt cream cheese and milk over a double-boiler, strain using a wire mesh sieve to get a smooth mixture.
  2. Remove from heat and add in butter, stir until butter melted.
  3. When mixture is cool, add in ingredients (B) and (C). mix well.
  4. Mix ingredients D and sieve into mixture in 3 batches.
  5. Mix well until mixture becomes thick.
  6. Whisk egg white and cream of tartar till frothy.
  7. Add in sugar (2 batches) and continue whisk until peak foam.
  8. Mix egg whites to cheese mixture with a spatula (in 3 batches).
  9. Pour batter into a 10" lined square cake tin (8 inch round removable base pan plus a 3 inch paper liner).
  10. Bake at preheat oven 150'C with water bath for 1 hour 10 mins.
  11. Leave the cake to cool in the oven with door ajar for 30 minutes- 1 hour.  This is to prevent the cake from shrinkage with sudden change of temperature.
Notes
  1. My variations in blue.
  2. For water bath effect, place 4 tart moulds filled with hot water in 4 corners of oven.  You do not need to wrap the pan with aluminium foil with this method.
  3. Tent the cheesecake by covering it with aluminium foil loosely when half way baked (about 20-30 mins) to prevent cheesecake from over browning.

Tuesday, 26 November 2013

Cake for Self


It's my birthday today...Happy Birthday to me :)  This is the first time i am baking my own birthday cake.   I thought I deserve some self loving :))  We all do, don't we?   So, might as well bake something that i will like and share the love!  

Being a citrus lover, I picked this kumquat orange cheesecake.  I never forgot how lovely it looked ever since i saw quite a few of my blogger friends baking it some time back.  Coincidentally, i saw kumquats at the store over the weekend and was also reminded of a kumquat bake that was made by Mel recently.  She simply loves kumquat, and it triggered my curiosity to try it out.

This is also my first bake with kumquat.  I love how it turned out, looks and taste wise.   Cake was creamy, the orange flavor was unmissable and the candied kumquat literally top it all!   And did i forget to say there wasn't much shrinkage and there were no cracks!  

Hopefully i will find some kumquats during the Lunar New Year to make this cake again.  Kumquats are auspicious for the chinese and this cake will definitely be something that will be very much welcomed. 


Recipe
Source : First spotted on Cherry on a Cake then Table for Two or More with original recipe from Vera of Baking Obsession

For the candied kumquats 
Source : Table for Two or More
Ingredients
  • 250g kumquats (slice thinly about 3mm and remove seeds)
  • 125g sugar
  • 125ml water
Steps
  1. Put kumquat slices in a heavy saucepan.
  2. Add in sugar and water.
  3. Stir then simmer on medium heat until kumquat slices turn translucent.  If it's too dry add a little water, there should be some syrup left.
  4. Store extras in a jar.

The Crust 
Ingredients
  • 1 1/2 cup vanilla wafer cookie crumbs (I used savoiardi lady fingers leftover from a previous tiramisu bake and finely ground in a food processor)
  • 1 tbsp packed golden brown sugar
  • 30g butter (cut into small pieces)
Steps
  1. Set the oven at 170C. Line a 6 inch spring form pan (i used a removable base pan) with parchment paper. 
  2. Combine all the above ingredients for crust. Mix well with fingers and pat and press into pan and up the sides about an inch. 
  3. Bake for about 15 minutes until the crust is golden brown and set. 
I wrapped the bottom half of the pan with heavy duty aluminium foil to prevent leakage since it was a removable base pan. 

The Cheesecake
Ingredients

  • 1/4 cup fresh orange juice 
  • 1/4 cup sugar, divided
  • 2 T finely grated orange peel (from 1 orange)
  • 250g cream cheese, room temperature
  • 1/4 cup sour cream
  • 1T all purpose flour
  • A pinch of salt4 teaspoon salt
  • 1 large egg (60g) plus 1 small egg (40g)
Steps
  1. Combine half the amount of the sugar and orange peel in the saucepan. Rub with your fingers until the sugar is moist and aromatic.
  2. Add orange juice and bring to a boil over medium heat, stirring until sugar dissolves. Reduce heat and simmer about 5 minutes until the syrup  is slightly thicken.  Cool completely.
  3. With an electric mixer beat cream cheese, remaining amount of sugar until creamy and smooth. Add in flour, salt and eggs one at a time. Combine well. Finally add cooled orange syrup/juice. Stir well to combine.
  4. Pour the cheesecake batter over  the crumb bottom. 
  5. Bake until softly set about 45 minutes. 
  6. When baked leave the cake in the oven for an hour to cool down and to prevent cracking the top. 
  7. Chill overnight and loosen the edges with a knife the next day and unmould (I manage to remove the cake from the pan after 2 hours without any chilling)
  8. Arrange the candied kumquats in circular rows on the top. 
Note:

  1. The recipe below is only 1/4 of the origin recipe and it is also with some slight variations from me.
  2. The original recipe recommended the water bath baking method.  I didn't use a waterbath but i place boiling water in 4 small tart moulds in the four corners of the oven and place cake on a tray above the moulds.

Sunday, 10 July 2011

Monkeying Around


Monkeying around to make some Monkey bread. Heard of them but never got to try them. It was curiosity about its name that attracted me to it. Common sense tells me there's no monkey in it, so what's the monkey about it then??

According to Wiki, this is an American bread. However, the origin of its name is uncertain. Possibly because it resembles the monkey puzzle tree or the act of people pulling at the bread when eating it is reminiscent of monkey behaviour. The bread is made by baking little balls of dough coated with butter and sugar in a cake pan.

I chose this recipe to follow mainly because I wanted to use up some cream cheese and needed to make some bread for breakfast, tomorrow. I knew most monkey breads are sweet breads, in fact very sweet bread, in some cases, sticky and gooey too. But this one didn't look too sweet, sticky nor gooey. However, I started feeling a little uneasy while making it, the amount of sugar was very high by my standards. There was no backing out at this point, i ended up reducing it all the way. I didn't reduce the amount used for the dough, for the coating, i used only 1/4 cup, 1/3 cup for fillings and the toppings 3 tablespoons.

I didn't have a bundt pan, make do with my chiffon pan instead. Glad that it still turned out looking pretty. The lemon coating added a nice touch to its already rustic look, like cobblestones to me. I was contemplating whether to go without the topping, but glad that i didn't omit it. Apart from making it pretty, it played an important role in the overall taste.

Verdict?
Tasted good. Glad that I reduced the amount of sugar, it was at an acceptable level for the family. It maybe because of this that it's not sticky which i do not mind at all. The combination of the lemon coating and the cream cheese filling gave it a nice flavour and breakaway from an overly sweet taste. It was soft, tasted more like cake than bread to me, though I am not too sure if it should be so :)

Saturday, 25 June 2011

For the love of Papa and Durians


The love for Durians, something that I share in common with Papa. Little one inherited my love for durians. Now we have a trio of durian lovers in the family, Pa, myself and little one. We would sit on the floor waiting for Pa to open them. Pa always bought them in whole. When Pa is not around, it will always be prepacked ones from the store without the husks.

When I saw this on Wen's blog, I decided to make one for him for Father's Day. I bought fresh durians and mashed them up with a fork. I knew it tasted good as soon as I finished whipping up the mixture because little one help scraped and cleaned the mixing bowl until it was sparkling clean! The steps were quite simple as it was a non baked one.

I topped it with a mixture of nuts (almonds, cashews, pistachios) and dried fruits (raisins, cranberries and figs). I loved the colour combination. I was happy how it turned out but little sis thought I went a little overboard :))

All ready and excited to present it to Pa that morning. Had planned to give him a surprise visit as he was back in our hometown. For some reasons, I had to take the public transport on that day.

A most unfortunate thing happened, when I reached home, the cake had started to melt! It was no longer as pretty as in picture above, how disappointing! It broke my heart :( I had to present an ugly cake to Pa. It was so stupid of me to choose this one when I already knew I had to take the public transport on that day! I thought it would withstand the journey since there was air-conditioning, apparently it wasn't good enough! A big mistake made for the love of durians.

However, Pa was so happy to see me and he comforted me by saying it was the thought that counts. It was still edible after putting it back into the fridge albeit being unsightly. It tasted good, the durian flavour was strong, close to eating durian in its original form (according to Pa). The toppings complemented the taste very well too. So glad that the taste of durian was prominent because I found out that actually Pa didn't have much of a fancy for durian flavoured stuff, maybe because it was too far from eating the real thing. But this one has real durians in them and one could still feel the texture :)

All in all this cake is good stuff, it was just a wrong choice in the given circumstances. As Pa put it, melted or not, it was the thought that counts!

Saturday, 9 April 2011

Say Cheese!


I guess there's no way one can run away from growing up in every aspect of life, it comes so naturally. In this case, it was getting into a tougher baking horizon (at least by my standards) after getting tired of the more classic bakes. I tried my hand on the Japanese Cheesecake. I love this cake, thanks to the ever innovative nature of the Japanese, their version of the cheese cake is so much lighter without compromising the cheesy taste, silky or creamy texture. For me, this is no piece of cake (pun intended :)) although other bloggers may disagree, you need to master the techniques of making a chiffon cake plus the know-how of baking with cheese. After what I thought could qualify as a decent chiffon (on the 3rd bake with 1 total failure) did I attempt this :)

Part 1 - The Sponge
Beating egg whites, this is one great challenge. Before this I didn't know that one could whack egg whites until they look like cream :) Seeing it turn into cream was quite satisfying (at least you know that you are on the right path), then came the next question, when do you stop beating? Some say beat until soft peak but others say stiff peak?? Assuming that you have decided whether to reach soft/stiff peak, the next question would be how to make sure it's there??? My first attempt went one full cycle and got back to where it started, the cream became watery again :(

The number of blogs that I read, pictures that I scrutinized, videos that I watched on youtube... it's amazing how the Internet is such a great source for self-learning. Having said that, my maiden attempt was still a disaster :(


Part 2 - Water Bath
Learnt something new here too, water bath for cakes! Never thought they needed baths! Cheese cakes need to be bake in a water bath by putting the pan with the batter into another bigger pan that is filled with water. This method ensures the the cheese is baked gently so that it won't darken, curdles or crack. With this comes the worry of water seeping into the batter. However, this is easier to overcome (with a trick or two) than beating egg whites to the right consistency for sure!

Final Worry
The final worry (with some other worries in between) would be whether your cake will shrink. Read that it's normal if it shrinks a little but not to the extend of half it's size and i dread those creases that it creates when it shrinks. It's so heartbreaking to see your beauty turn into an ugly duckling.

Fortunately, the first attempt didn't turned out too bad, the only setback was it shrunk more than what I hoped it would. But I am really glad i tried it, it tasted better than I thought it would. I tried this a second time, shared it with 2 friends and they loved it too. There's going to be a third time for sure as I have decided that this will be my choice for an upcoming birthday :) I hope it will be perfect by then.

I am not sharing any recipe for this one, simply because I am no expert and I made lots of references before attempting it. If you are interested to give it an attempt, try this one, it comes with tips and tricks. Good luck!

Monday, 11 October 2010

Early Christmas Mood


Made another oreo treat over the weekend. What motivated it? Nothing in particular, I guess one never gets bored of those cookies and of course the other reason was nothing other than little one. This time it was a cream cheese version by Martha Stewart. It was something which was highly recommended.

Apart from the recommendations, the push factor was because it sounded too easy to be true. There was no need to crush cookies for the base (quite a norm for cheese cakes), a whole oreo cookie was used instead, a very innovative idea. Cream cheese and cookies were all that was needed to make this treat. Simple isn't it? I just had to try it out. I halfed the recipe and it yielded 15 of those cute little things. Dropped additional bit of crushed cookies in the centre for extra oreo ummph and make it look prettier, i hope :)

While lining them up for a photo shoot, i felt a rush of the christmas mood cheer. I know it's still early but then it's nice to be in that mood...warm overflowing love, spirit of giving, kindness, family, happiness, laughter, gifts, parties, great food and yes snowy cold weather (hopefully we will have a white one this year), hence hats and all in the photo! I hope I got all of you in a little christmas mood now :)

Lovely bottoms!

Verdict? Sinfully delicious! It is definitely something to put on the year end christmas party table :)
Try it, it's simple enough for everyone!

Share

Twitter Delicious Facebook Digg Stumbleupon Favorites More