Advertisement 300 X 250

Girls' Best Friend

Bright and sparkly. Gemstones came to my mind when I was removing this Dragon Fruit and Orange jelly from the mould. Like a combination of gemstones...rubies, amber and diamonds, all in one!

Dragon's Eyes

The literal translation for the name of a small brown, juicy exotic fruit from the lands of Asia, known as Longan in Chinese, packed into these muffins

Nostalgia

A taste from the humble beginnings, the Long Bean Rice brings back beautiful memories of the yesteryears

Light and Fluffy

Lemon, Yogurt and Cranberries~a nice blend of flavours in a light and fluffy chiffon cake

Bread Stories

Asian style buns ~ Popular as breakfast food or snack, sweet/savoury fillings wrapped in soft, cottony bread

Saturday, 19 November 2011

When the Vikings come marching in...


Steamed Buns are popular favourites among us Chinese for our breakfast. Typically they can divided into 2 categories, the round shaped ones with fillings in them are known as Pau while the non-filled ones, traditionally rolled in a log shape and cut into pieces before steaming are known as Mantau.   However, the line differentiating them has gone blurry, paus can come without fillings and vice versa for mantaus.  They come in various flavours and shapes never imagined too!  Like this one that I saw at Wendy's, a little like the Vikings' helmets to me,  I thought they look cute :)

These steamed buns are not filled.  They had a nice sweet fragrance and natural sweetness from the sweet potatoes making them pleasing although eaten plain.  You can cut them up and spread some jam or dip them in gravy.

Verdict? They were really yummy! They rose beautifully and were soft but chewy.  They stayed soft until the next day!  I saved half the portion in a ziplock after shaping them and steamed them for freshly steamed and piping hot buns the next morning.

This was the first time I steamed them in a bamboo steamer basket which I have been planning to get for awhile.  I have read that they give the best  results for paus and other steam cakes.  After finding one the right size which I bought for RM30, I couldn't wait to try it out.   This basket sits on top of another pot of boiling water, steam then enters through the open slates at the bottom of the basket and contained in the basket by its lid.  Bamboo absorbs condensation ensuring water does not drip back onto the buns which allowed them to rise so beautifully without any crinkles! I love the effect, I am really convinced that these baskets do make a difference, well bought indeed!

Take a closer look at these babies :)


Recipe
Source : Table for 2 or more... (this is 1/2 the portion which gave me roughly around 16 buns...can't remember exactly)


  • 250gm pau flour (cake flour)
  • 125gm steamed orange sweet potato
  • 50gm sugar
  • 1/2 Tbsp double action baking powder
  • 1/4 tsp salt
  • 20gm shortening, melted
  • 6gm yeast 
  • 1/4 tsp sugar
  • 75ml water
If like me, you are using a machine to knead, skip steps 1-7 but follow through step 6.  I used my breadmaker to knead the dough, I put everything in the recommended order, i.e. liquid (water, melted shortening), sugar, salt, followed by flour (sifted and mix with baking powder), mashed sweet potato and lastly yeast.  


  1. Proof yeast with 1/4 tsp sugar and water until it froths.
  2. Mix flour, baking powder, sugar and salt together. 
  3. Knead in steamed sweet potatoes. 
  4. Flour mixture will look crumbly. 
  5. Pour in frothy yeast mixture and combine to form a dough. Knead until dough no longer sticky and turns smooth. 
  6. Add more flour if it's too sticky or more water(by the teaspoon) if it's way too dry, (if unable to gather all the flour into a dough).  
  7. When dough is smooth, knead in melted shortening, until dough no longer feels oily.
  8. Leave to proof until double, about an hour.
  9. Punch down and knead for another minute. Divide dough into 35gm pieces, and shape as u like.  For these helmets, roll the dough flat in a triangular shape, roll them up and pinch two ends together tightly to make sure they don't open up.  Hop over to Wendy's for a pictorial guide on how to shape.  Other easier methods would be making them into round balls or just rolling them up without trying to pull it into a triangular shape.  
  10. Leave to proof until shaped bun doubles. 
  11. Steam on high heat for 12-15 minutes.

Monday, 14 November 2011

Say Peace!~Ginger Cupcakes


This post is dedicated to Aspiring Bakers theme for November.  Wanted to take this opportunity to learn something new and hopefully interesting enough to share with others.    I settled for this although I knew this would be something I would like but the boys wouldn't fancy :)  But we deserve to act selfish at least once in awhile, don't we?


I have never tried baking with ginger although I love ginger cookies.   No, not those little men that come marching out around this time of the year but those small round ones with cracks all over them.  I love them with my coffee.  Ginger makes one warm and fuzzy, which I thought would be good at this time of the year, wintery or rainy.

So, I had a go at this one.  Verdict?   Nice, I love the spice in them.  It was soft and moist too.  Although it has 3 forms of ginger in it (ground, fresh and crystallized), I would have preferred it to be more intense, will spike up the amount of ginger powder the next time around.  The other thing that I  I would change is to cut down on the amount of sugar, it was a tad too sweet for me.

Recipe
Seen on Alpine Berry with recipe from Fine Cooking issue #64  
(Half the recipe yielded 12 cupcakes)

  • 4 ounces (1 cup + 3 tbsp) sifted cake flour
  • 1 tsp ground ginger
  • 1/4 tsp nutmeg
  • 1/4 tsp salt
  • 1/4 tsp baking soda
  • 1/8 tsp baking powder
  • 6 tbsp (3 ounces) unsalted butter, softened at room temp.
  • 2/3 cup granulated sugar (1/2 cup)
  • 1 tbsp finely grated lemon zest
  • 1-inch cube fresh ginger, finely grated (plus any juice) (Took juice only)
  • 1/2 tsp vanilla extract
  • 1 large egg
  • 1/2 cup sour cream
  • 1/4 cup crystallized ginger, finely chopped


  1. Preheat oven to 350F. 
  2. Sift together cake flour, ground ginger, nutmeg, salt, baking soda and baking powder. Set aside.
  3. Cream butter and sugar until light and fluffy, about 2 minutes. Add the lemon zest, grated fresh ginger, and vanilla extract and beat for 1 minute. Scrape down the sides of the bowl. Add the egg and beat until smooth, about 1 minute. 
  4. Using a rubber spatula, fold in one-third of the flour mixture. Fold in half of the sour cream. Repeat ending with the last third of the flour mixture. Fold in the chopped crystallized ginger.
  5. Fill the cupcake liners approximately three-quarters full. Bake until light golden brown and cupcake springs back when lightly pressed, about 16-20 minutes. 
  6. Cool in pan for 5 minutes, then transfer to cooling rack. Allow cupcakes to cool completely before frosting.

Lemon Cream Cheese Frosting
  • 6 ounces Philly cream cheese, softened at room temp.
  • 2 tbsp unsalted butter, softened at room temp.
  • 2 tbsp finely grated lemon zest
  • 1 tbsp freshly squeezed lemon juice
  • 1 1/2 cups confectioners’ sugar (1/2 cup)
  1. Beat cream cheese and butter until smooth. 
  2. Mix in the lemon zest and lemon juice. Gradually mix in the confectioners’ sugar. 
  3. Continue to beat until frosting is smooth and fluffy.
  4. Frost cakes as desired.
I am submitting this post to Aspiring Bakers #13: Enjoy Cupcakes(November 2011) hosted by Min of Min's Blog.

Update : I was pleasantly surprise to see these feature on Cupcakes Take the Cake :)

Sunday, 6 November 2011

A Small Fortune Perhaps?


This post was supposed to be for Traditional Kuehs, Aspiring Bakers' theme for the month of October but as it is, I missed the boat.   Here's the story behind what inspired it...

Fortune is very much a part of the Chinese culture.  Doubts? Most of you would have heard about the Chinese fortune cookie to begin with.   In our culture, so much is being centred around ways to ensure good fortunes get ushered into our lives...colors that we wear, words that we utter,  where and how we place stuff around.  Even the food that we put in our mouths are not spared, we make them in auspicious  colors, shapes and top it all with an auspicious sounding name in hopes for more fortunes to come.    It is amazing how every aspect of our lives can be tied it.   Somehow or rather, I feel a materialistic mindset or if i were to put it on a lighter node, it's this constant reminder of the importance of money/fear of insufficiency is subconsciously nurtured because of this culture.  It is a good motivating factor, but the i think the key is finding the balance.  When do we draw line?? I have no answer to this myself, striking a balance is a challenge.  Because there are things that we sacrifice in the pursuit for more fortunes, we can't have them all.   Is it worth the sacrifice?  I may not know or choose to belittle the price that I pay for now but would it be too late when I realise it?  Do I sound like a lost soul? I hope not :)


This is one little cake that got itself caught in the fortune culture.  It is known as "Huat Ker" in my dialect, of which Huat means 'Prosper'.    This little steamed cake is suppose to bring good luck, to the ones making, giving and of course to those eating them too.  One thing that this little thing is sure to bring is ...inches if not fortune!   For those making them, there is no better reward then opening up your steamer to see a tray of beautifully  bloomed cakes, a sign of good fortune to come, so they say....

Unfortunately, this was what greeted me when I opened mine.  Bloomed they did but they looked like buds rather than flowers to me!   Maybe God was trying to remind me, a small fortune was all that I need, don't get too caught up with it! Yes, that must be it! Good excuse to hide from the real reason why they didn't bloom as well as they should!  Actually, i am not too sure why too, it would be good if any of my dear friends could enlighten me.  Recipe says double action baking powder, mine does not have the word double, could this be the reason??

Anyway, this was made with some sweet potatoes, giving it a nice yellow orangey color, gold like in auspicious lingo:).  It was soft, moist and sweet smelling, pretty yummy.

Recipe
Source : Cherry's Kitchen (hop over to her blog to see her blooms and variety of flavours)

A Ingredients - Yeast dough
  • Plain flour 50g
  • Water 50g
  • Yeast, 1tsp (7.5gm)


B Ingredients 
  • Sweet potato (steamed), 200g 
  • Coconut milk, 120g 
  • Water, 40g 
  • Orange sugar, 140g (Fine Sugar)
  • Egg, 1 
  • Plain flour, 200g
  • Double acting baking powder, 1dsp (1 dsp = 2 teaspoons, probably the culprit)


Method
  1. Mix yeast dough (A) ingredient together. Leave aside for ½ hr until it has proofed.
  2. Combine mashed sweet potato, coconut milk, water together and blend it. Add in flour, double acting baking powder, yeast dough and mix evenly (Mix quickly in one direction, do not overmix). 
  3. Pour mixture over cups. Dip a spatula in oil and make an “X” across the batter. Leave it aside to proof for 10 minutes. Steam over high heat for 15 minutes.

Sunday, 30 October 2011

Happy Birthday Papa


Happy Birthday Papa! I am so happy that I managed to make you a cake for the second time.  I was tempted to buy this time around as I was still finding it a little difficult to adjust to some new changes in life leaving me without the mojo and limited time to squeeze in a bake.  Contemplated but I didn't want to break the tradition that I started only 1 year ago.  Like the previous year, I stayed away from creamy cakes simply because Pa was never fond of them.  Chose this fruit bake that I saw at Angie's.  Her photos were simply beautiful.


Angie used Damson plums, I bought a mixture of 2 types of plums that were available in the wet market on that day. I love how it turned out looking so pretty.   It was heavily loaded with plums, all beautifully arranged in circles, it was almost a pity to cover them with streusel.   It smelled so wonderful even when it was still in the oven.  

The taste?   If you like a fruity bake, you would love this one.  The fragrance from the plums itself was already captivating.   Every bite is laden with thick plum slices. The cake was infused with the juice that flowed from the plums.  The streusel toppings gave a crunchy finish to the cake.

All in all, it was a choice well made, a great looking cake with a taste to match which was also a taste of something new to the family.

Hop over to Angie's for the recipe.
   

Friday, 14 October 2011

Calling Coffee Lovers


If you are a coffee lover, I am 101% (possibly higher) sure you would love this! By far, this is the best coffee muffin that I've ever had.  Try it out, no regrets guaranteed, yes that's how confident I am of this one :)


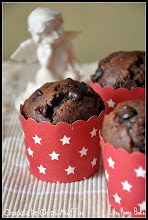
The muffins turned out pretty, with a nice dome (2 different types, 1 rounded while the other was pointed, read on to know why) and the crust at the top layer was fine but crisp to the effect of melt in the mouth.  The muffin was very soft and moist, bursting with coffee aroma to please the coffee addict that I am.  It was that good! I am so happy I found this recipe.  Credits to Helen, the owner of the recipe  who  mentioned it took her some effort to fine tune the recipe to perfection.


I made 2 variations with the batter.  The ones in green with white polka dots muffin case had a teaspoon of Kaya in them (I got the idea from Happy Home Baking, something that I came across sometime ago but could never forget) while the pink with red polka dots ones had cranberries plus a little brown sugar as toppings.  I thought the adding of Kaya was a very creative idea (think having coffee with a piece of toast with kaya (coconut milk) spread, yummy right?)  They are both delightful.


The little patch in the centre is the Kaya spread.


Recipe 
Source : Eepoh.com


* Notes : My variations in red
  • 100g butter
  • 50g castor sugar (70g brown sugar)
  • 50g icing sugar (30g icing sugar)
  • 2 medium eggs (1 1/2 extra large eggs - the only type I have at home)
  • 80g yogurt
  • 1 tbsp whipping cream (optional.. but then the muffin texture is better if added)
  • 135g all-purpose flour (Cake Flour)
  • 1/4  tsp baking soda (not baking powder)
  • 1/4 tsp salt
  • 1 - 2 tsp cinnammon (3/4 tsp, afraid it would overshadow the coffee aroma)
  • 1 tsp vanilla essence
  • 1 tsp butter essence (omitted)
  • 1 to 1 1/4  tbsp instant coffee (I use Nescafe Classic) mix with 1 tbsp hot water. 

Steps


  1. Beat butter and sugar until light and fluffy.
  2. Gradually add the eggs, vanilla/butter essence and coffee mixture. Beat mixture to combine well.
  3. Sieve flour, baking soda, cinnamon and salt.
  4. Add half the flour mixture into butter-egg mixture. Fold in.
  5. Add yogurt and whipping cream. Fold in.
  6. Add the remaining flour mixture and fold in.
  7. Spoon mixture into muffin cups and bake in preheated oven at 180C for 25 mins (baked at 200C, anything lesser doesn't give me a bloom, probably happens to my oven only).
If you like to try them with some Kaya, fill the cup with half the batter, put in a teaspoon of kaya and continue to fill up the cup.

For cranberry toppings, scatter some dried cranberries on top followed with a little brown sugar.

Wednesday, 12 October 2011

Cheeky Meals


Did you smile at the little 'chick' up there?? I hope so, it looks kinda cute nestled in its nest doesn't it?  This was another fun lunch that I made for little one.  I first saw it at Angie's blog.  Angie, if you happen to stop by, thank you for the beautiful photos that captivated me and also the simple and doable recipe.  I added a little 'chick' to fill the nest to make it less lonely maybe? :)

Making this was easy, all it took was 30 minutes minus cutting the beaks and crest for the chicks, but that was all for the fun of it.  I intended for them to be little birds but little one said they look like chicks, so chicks they will be :)


"Here, meet my brothers and sisters! There are 7 of us altogether!"

"Oh, did i tell you there's another 2 of us who are soundly asleep in their cosy shells still? Hmm, maybe I should wake them up!"


Recipe
Source : Angie's Recipe

Note : Variations in red
  • 200 g Spaghetti
  • 3 tbsp Parmesan, grated
  • 2 tbsp Breadcrumbs
  • 2 Large eggs
  • 3 tbsp Whipping cream
  • 1 Tomato, diced
  • 50 g Prosciutto, diced  (ham)
  • 125 g Fresh Mozzarella cheese, diced
  • 3 tbsp Chives, chopped (1 stalk of celery, diced)
  • Salt and pepper
  • Served with some tomato sauce 
  • Quails Eggs, Lettuce
  1. Cook pasta in large pot of boiling salted water until al dente, according to pack instructions. Drain pasta. Return to same pot and toss with grated Parmesan and breadcrumbs.
  2. Use a fork to stick into the spaghetti and bring up a heaping forkful. Turn and twist the pasta to form a nest. Repeat until you have 8 nests (or according to preferred nest size). Place them on a baking tray lined with paper. At the same time, preheat the oven to 200C/400F
  3. Stir together the eggs and cream until just blended. Season to taste. Add in diced tomatoes, ham, Mozzarella, and chopped chives  (or any other greens). Divide the mixture and spoon them in the center of each nest. Bake the spaghetti nests on second rack from the bottom of the oven for 15-18 minutes (I baked mine for 12 minutes only, dependent on oven heat and I preferred it slightly wet).

Sunday, 9 October 2011

Matcha Marble Chiffon Cake


What do you think of this cake? Pretty? I thought so when I saw it at Cosy Bake.   After baking one myself, I couldn't agree more and it tasted so good.   It's so soft and cottony and the intensity of the green tea scent and flavour felt just right when blended with the plain chiffon.  I don't mind green tea but being a coffee person,  green tea flavoured stuff didn't attract me too much (before this).   But I found myself loving this so much, I may end up being a convert.  It was so good I made it twice to share with friends.


It was fun trying to create the swirls.  For this one, I put dollops of the green batter at different layers and use a knife to create the swirls at each layer and finally gave the pan a few turns after everything was in.

This is a shot from the second cake that I baked.   The swirls are slightly different from the first one.  I had more green batter at the bottom and used a knife to create the swirls only after filling the pan with all the batter.  Confession, the primary motivation to make this one was to have another go at the swirls,  sharing came in convenient :))


My only comment is this cake is very delicate, i was tempted to reduce the amount of water by 10% probably.  Then again mine might be softer because I put in all the egg yolks when the recipe called for 3 only :)  Delicate is nice but delicate to the extend that it difficult getting it to stand on its own makes handling a little difficult and there's no sponginess to it?

Hmm, maybe i should find another excuse to give it another attempt...

Recipe
Source : Cosy Bake

* Note : Wordings in red denote my variations from the original

Ingredients
  • Top Flour   90g (Cake Flour)
  • Baking powder   2/3 tsp
  • Castor sugar   40g
  • Egg Yolks   3 (used 4)
  • Salad oil   40g (Canola Oil)
  • Water   90ml
  • Egg Whites  4
  • Castor sugar   40g
  • Matcha powder   1tbsp
  • Water   2tsp

Method
  1. Sift flour and baking powder and set aside. (Sift twice)
  2. Mix matcha powder with 2tsp of water to make a paste.
  3. In a bowl, mix yolks, oil and water together. Add in sugar, followed by the flour. Mix to a thick batter.
  4. Whip egg white till foamy and slowly add in sugar and whip until stiff peaks.
  5. Mix 1/3 of white to the flour batter and blend well. Fold the rest of the egg white in and fold them gently till well blended.
  6. Take 1/4 portion of the batter to mix with the matcha paste. Fill the chiffon tin with plain batter and in between layer filled with matcha batter. With a skewer, run through the tin to create the marble effect.
  7. Bake the cake at 180ç for 10 minutes, and bring down to 160'c and bake for further 30 minutes. (Bake at 180C for 45 minutes (cover top with aluminium foil).  After 45 minutes, remove foil bake for another 10 minutes)
  8. Cool the cake with the tin inverted on a wire rack till it's completely cool before slicing.

Share

Twitter Delicious Facebook Digg Stumbleupon Favorites More