Advertisement 300 X 250

Girls' Best Friend

Bright and sparkly. Gemstones came to my mind when I was removing this Dragon Fruit and Orange jelly from the mould. Like a combination of gemstones...rubies, amber and diamonds, all in one!

Dragon's Eyes

The literal translation for the name of a small brown, juicy exotic fruit from the lands of Asia, known as Longan in Chinese, packed into these muffins

Nostalgia

A taste from the humble beginnings, the Long Bean Rice brings back beautiful memories of the yesteryears

Light and Fluffy

Lemon, Yogurt and Cranberries~a nice blend of flavours in a light and fluffy chiffon cake

Bread Stories

Asian style buns ~ Popular as breakfast food or snack, sweet/savoury fillings wrapped in soft, cottony bread

Showing posts with label Bread. Show all posts

Wednesday, 2 July 2014

A Very Berry Good Morning!

I was on a berry buying frenzy the other day.  Isetan Kuala Lumpur was offering every other type of berries (strawberries, blueberries, blackberries, cherries and raspberries) at a bargain in conjunction with the Mega Sales event.  Yippee! If you visit me often enough, you must have read about me lamenting how expensive berries are on this part of the world.  So, you can imagine how crazy i went when they were going at a discount.  I bought at least a punnet of every other berries that they had.  Very berry happy i was :)


I couldn't wait to lay my hands on something that has lots of berries in it :))  I ended up making this swirl bread by Joy the Baker.  This recipe is one of the challenges for a Baking Bootcamp in which she is partnering with King Arthur flour.  The many photos of this beautiful bread  of those taking part in the challenge was just captivating. 

The biggest challenge is the braiding and then the transferring to the baking pan.  The dough was really soft, berries falling off here and there when you braid it and added to that some berries started to bleed after the dough is cut.  It's doable but not easy!  The key to this is to do it fast!  I must admit i didn't do too well :(

We had it for breakfast the next day, the bread was still soft without any need to reheat it.  Buttery, moist, cinnamony, bursting with berries and their juices.  Just delicious!  I am thinking a scoop of ice cream will go very well with it too :)

Recipe
Reference: Joy the Baker and Bryony Cooks

Ingredients

Dough
  • 2 1/4 tsp. active dry yeast (2 tsp)
  • 1 tbsp. granulated sugar
  • 3/4 cup whole milk, warmed to a warm lukewarm
  • 1 large egg yolk (1/2 medium size egg)
  • 2 tbsp. unsalted butter, melted (28g)
  • 2 1/4 cups King Arthur all-purpose flour (280g)
  • 1/2 tsp. salt
  • Olive oil, for greasing the bowl (omitted)
Filling
  • 1/4 cup unsalted butter, room temperature (56g)
  • 1/4 cup granulated sugar (45g)
  • 3 tsp. ground cinnamon (2 tsp, 1/2 tsp ground nutmeg, 1/2 tsp ground ginger)
  • 2 cups fresh berries (sliced strawberries, raspberries, blueberries, blackberries)
  • 1 large egg, beaten, for egg wash (1/2 medium size egg)
Method
  1. In a medium size bowl, heat milk until warm.  Stir in yeast and sugar. Add in the egg and melted butter. Whisk together until thoroughly combined. Allow mixture to rest until it becomes foamy, around 10 minutes.
  2. In a large bowl whisk together the flour and salt. Pour the milk mixture over the dry ingredients and bring everything together into a rough dough.  Place dough on a lightly floured counter and knead by hand for about 10 minutes more. Dough ball should be soft and smooth after kneading.   Shape dough into a ball.
  3. Place the dough in a bowl that has been lightly greased with olive oil and cover.   Allow to rest in a warm place for about 1 hour, or until doubled in size.
  4. While the dough rises, whisk together the butter with cinnamon and sugar for the filling. Set aside.
  5. Preheat the oven to 375°F (190°C).  Grease a 10-inch cast iron skillet (I used a 9-inch springform cake pan). Set aside.
  6. After the dough has doubled in size, place it on a lightly floured counter and knead twice. Using a rolling pin, roll the dough to a rectangle of about 18×12 inches.
  7. Spoon the cinnamon filling over the top, spreading evenly, leaving a clean 1-inch border around the edges. Sprinkle the fresh berries over cinnamon filling. Start by rolling the longest side of the dough. The roll will be a bit lumpy because of the berries. Using a sharp knife, cut the log in half lengthwise leaving 1-inch of the edge uncut.
  8. Start braiding the two pieces by lifting the left strand over the right strand. Repeat this motion until you reach the bottom of the dough. Press together to seal. Join the two ends, creating a circle with the dough and press together.
  9. Using two swift hands, transfer the dough ring to the prepared cast iron skillet/pan. Brush the wreath with the beaten egg.
  10. Bake for 20-25 minutes until golden brown.  Allow to cool for about 30 minutes before slicing and serving. Sprinkle with powdered sugar, if desired.
Note: 
  1. I followed through Step 1 but i let my breadmaker handle the kneading using the Dough program.  
  2. For Step no. 3, i left the dough the dough to rise in the breadmaker.

Tuesday, 24 June 2014

Wu Pao Chun Loaf with a Japanese Twist

Some of you might have come across the Wu Pao-Chun milk loaf by now.  A recipe that has been popular with quite a few Asian food bloggers recently.  I caught the bug too and gave the original recipe a try here.  The results are satisfying and I like the recipe for its simplicity.  One that you can rely on when you realised too late that there's nothing for breakfast tomorrow.  Pop everything in the bread maker and you will wake up to a freshly made loaf the next morning!

This one here is a variation of the original recipe.  The inspiration came from Baking Taitai who spiced up the plain milk loaf with matcha (green tea) and white chocolate chips.  I didn't have any white chocolate chips on hand but i had white chocolate Toblerone, and yes you can guess what happened :))  Apart from that, I added some craisins for the color and tang to cut through the entire sweetness.

Quite an enjoyable breakfast it made even when eaten on its own. The bread was creamy from the addition of chocolate, lightly scented with a fresh green tea fragrance which reminded me of green tea latte and the cranberries provide some bite and a tangy flavor.  

I noticed the dough took longer to rise than the original recipe, just have some patience and wait until it doubles its size.  The other thing that puzzles me is there was some shrinkage, i suspect it was because i removed the loaf immediately after i took it out of the oven,  i am wondering if its because the loaf was still very soft when it was hot and it got a little compressed when the pan was inverted!

Recipe
Inspired By: Baking Taitai

Ingredients
  • 290g bread flour
  • 10g matcha powder
  • 14g sugar 
  • 1 tsp salt
  • 15g unsalted butter
  • 1 tsp instant dry yeast
  • 198g milk
  • 1/2 cup craisins
  • 3 triangular pieces of Toblerone 400g
Steps
  1. Mix all ingredients (except butter, chocolate and craisins) into a dough using low speed, then use medium speed to knead it into a shiny and smooth texture.
  2. Add in the unsalted butter, then knead it using medium speed until it forms dough that can be stretched into a thin, translucent membrane.
  3. Mix in white chocolate and craisins.
  4. Proof the dough for about 60 minutes. (Until about double the size)
  5. Punch dough down and allow dough to rest for 10 minutes.
  6. Roll into a rectangular shape with one side not longer than length of pan/tin that will be used for baking.  Roll up dough like a swiss roll from the shorter side.
  7. Turn dough 90 degrees.  Roll it into a rectangular shape again as in step 6.  Roll up dough like a swiss roll again.  Seal seams and place in pan.
  8. Place it on the baking tray and go for final proofing for another 50 minutes. (I used a Pullman tin for a 450g loaf and put it to bake when it was 90% full .  I baked it uncovered)
  9. Bake in a preheated oven at 180°C for 30 – 35 minutes
  10. Remove the bread from the pan after 5 minutes and cool on rack to prevent sweating.  
Note:  I combine all the ingredients (except chocolate and craisins) and let my breadmaker handle steps 1, 2 and 3 using the Sweet Bread program.  The Sweet Bread program will beep signalling the point to add in ingredients like raisins or nuts.  Add in chocolate and craisins at this point.  I stopped the program once its reaches the Rise stage.

Photobucket

Saturday, 14 June 2014

Mesmerizing Swirls

I have been wanting to make this loaf after being mesmerised by the one that i saw at Jeannie's.  I couldn't get the beautiful swirls out of my mind :) Healthy ingredients make the push for making the loaf greater.  And as they say, the rest is history!

I couldn't wait to cut the loaf to check how the swirls turned out the moment it was ready.  Hence, the reason behind the why there is a different shades between the 2 photos.  The first one was taken immediately after the loaf was ready and it was already late evening by then whereas the one below was taken the next morning when there was plenty of light. If you can, have some patience, don't do what i did, one should only slice a loaf when it has cooled down :)) 

 
Mine was a little dry because it was a little over baked, i didn't realized the oven had beeped while i was yakking away on the phone but it tasted good overall.  I will definitely make this again whenever i miss those beautiful swirls!


Recipe
Source: Baking Diary

Ingredients
  • 1 cup (250 ml) milk
  • 1/4 cup (62 ml) lukewarm water (1 large egg) 
  • 2 tablespoons (28 grams) unsalted butter or margarine (32g unsalted butter)
  • 1/4 cup honey
  • 3 cups (381 grams) bread flour
  • 3/4 cups rolled oats
  • 2 1/4 teaspoons instant yeast
  • 1 1/2 teaspoons salt
Chocolate layer
  • 30 gm chocolate
  • 1 tbsp cocoa powder

Method
  1. Prepare the chocolate layer - melt the chocolate in a microwave by zapping it for about 40 seconds on high.  Then stir in the cocoa powder until mixture is smooth and has no visible lumps. Set aside until ready to use.  (I melted it using a double boil method)
  2. If using a bread machine, put in all the liquid ingredients first before adding the dry ingredients.  Use the dough mode to knead. (I used the bread machine)
  3. If kneading by hand, pour the liquid ingredients to the dry ingredients and mix until it comes together to form a soft dough.  Knead until the dough is smooth and elastic. 
  4. If the dough is still very wet and sticky after 5 minutes of kneading, add more flour, 1 tablespoon at a time, until the dough is barely tacky.  If the dough is too dry, add water, 1 teaspoon (5 ml) at a time, to soften it up.
  5. Once the dough is smooth and elastic, remove about 1/4 of the dough into a separate mixing bowl.  Knead in the chocolate mixture.  
  6. Place each portion of the bread dough separately in lightly oiled bowls, cover, and allow to rise until doubled, about 1-1 1/2 hours.
  7. Once doubled, place the plain dough on a lightly floured surface.
  8. Gently punch the plain dough down and with a rolling pin, roll the dough out into a rectangle approx. 9”x12”. 
  9. Do the same for the chocolate dough, but roll out into a smaller rectangle approx 7"x 10".  Place this on top of the plain dough.  The chocolate dough should be well inside the plain dough.
  10. Fold over the plain dough (top, sides, bottom) to cover the chocolate layer.  Pat it flat so that it's easier to roll out next.  (Letter fold the plain dough over the chocolate layer)
  11. Roll the dough into a rectangle shape, and fold the dough in three lengthwise.
  12. Turn the dough 90 degrees and repeat step 10.  Roll the dough out into a rectangle and fold over into threes.  Turn.
  13. The more turns you made, the more layers and marbling you'll get.  I turned it about 5 times only as the layers were becoming quite thin.  (Keep turning and letter folding until the chocolate layer becomes very visible, lost count of how times i turned it)
  14. At the final rectangle, roll the dough up like a swiss roll into a loaf and tuck in the sides neatly.  Place the shaped dough into a loaf pan, cover with a clean towel and allow to rise until doubled, about 1 - 1 1/2 hours. 
  15. Preheat oven to 350 F (180 C).
  16. When the shaped loaf has doubled, place the bread in the oven and bake for 40 to 50 minutes, until the bread is deep golden brown and the internal temperature is about 190F (I set mine to 35 minutes)

Monday, 26 May 2014

From Incredible India

Asia Food Festival blogging event moves on from Korea to India this month.   My family and I are more familiar with the spicy side of Indian cuisine although there's a whole kaleidoscope of diversity that we have yet to experience.  Very limited exposure i must say but we have always enjoyed this side of it.  Breakfast items like the various indian breads are almost a weekly event too. 

Although hubs and i love Indian food, i seldom make it at home for two reasons.  Firstly, my son's heat level tolerance is relatively low compared to us and secondly i am intimidated by the many types of spices used.    I tend to forget and get confused about which is which.   Cumin and fennel for example, they look very similar and it does not help that their Malay names are very close, Jintan Putih for Cumin and Jintan Manis for Fennel, now how's that to add to the confusion?

So, i set out to look for Indian recipes that would be simple enough for me to tackle.  Simple as in not too long list of ingredients and most importantly spices that are not foreign to me.  I was glad to find Swapna's Cuisine.  She had this pork recipe named Nadan Panniyearchi Ularthiyathu/Kerala Style Pork Fry.  I thought I could try this with pork ribs instead to add to my collection of pork ribs dishes from the various Asian countries alongside this event.  If you like pork ribs, you may want to check out these delicious ribs recipes from Thailand, Japan and Korea too.

This Kerala version turned out delicious and i am now convinced that one doesn't actually need coconut milk to make it so.  Our localized version of curries almost always have coconut milk in them turning them into something that is not the healthiest food to take often.

The other thing that i like about her recipe is that she included a recipe to make a meat masala from scratch which were a combination of some spices that i had on hand, so instead of running to the store to get a bottle of meat masala (which does not come cheap), i could just put it together myself.


When the meat dish was successful, i got more confident and started looking for more on Swapna's blog to make it a complete Indian meal.   And this was the Indian meal we ended up with on that day.   Best eaten with hands!  Garlic Naan bread to go with spicy ribs and a yogurt based salad to balance the meal and cool down the heat :)


I find this naan recipe quite unique, credits to Swapna again for the recipe.  Yogurt and honey was in its ingredient list and based on my experience so far, even when used separately yogurt and honey are ingredients that gives us soft fluffy bread.  I couldn't wait to try the results when both of them are put together.  It was crisp on the outer layer but fluffy soft inside when eaten hot.  I could just eat them like that :).

As for the salad, it was just a simple recipe that i made up inspired by the cucumber salad that is frequently served as a side dish for banana leaf rice at Indian restaurants.   

Recipe - Kerala Style Spicy Pork Ribs

Ingredients
  • Pork – 1 kg, cut in to cubes and cleaned (800g pork ribs)
  • Coconut slices / Thengakothu – ½ cup (omitted)
  • Onion-2 big, sliced (used only 1 since the onion was quite big)
  • Pearl onions / Chumannulli – ½ cup sliced (omitted)
  • Ginger, minced – 1 ½ tbsp 
  • Garlic minced – 1 ½ tbsp
  • Green chillies -3 or 4 sliced (omitted)
  • Homemade Erachipodi / Meatmasala -3 to 4 tbsp (OR you can add 1 ½ tbsp chilly powder, 1 ½ tbsp Coriander powder, ½ tsp- Turmeric powder, 2 tsp- Pepper powder, 6 cardamoms, 6 cloves, 3 x 1” piece cinnamon sticks all powdered together) (1 tbsp chilly powder, 1tbsp Coriander powder, ½ tsp- Turmeric powder, 1 tsp- Pepper powder, 4 cardamoms, 4 cloves)
  • Curry leaves – few
  • Mustard seeds – 1 tsp (1 tsp mixed spice with combination of mustard seeds, fenugreek, cumin, fennel) 
  • 1 2” piece cinnamon stick
  • 1 medium size tomato, cubed
  • Oil- 2 to 3 tbsp
  • Salt to taste 
Method
  1. Heat 2 tbsp oil in a pressure cooker and splutter mustard seeds.
  2. Add coconut pieces / thengakothu and stir fry until coconut pieces are light brown (omitted)
  3. Add sliced onion, pearl onion, ginger, garlic and curry leaves; stir fry until onions become limp.
  4. Add in tomatoes, mix well and stir fry until tomatoes soften.
  5. Reduce flame and add erachi podi / meat masala and sauté making sure not to burn the powder.
  6. Add cleaned pork pieces and continue stirring until masala coat pork pieces and meat turns opaque and smell fragrant.  
  7. Add ¼ cup of hot water and pressure cook the pork for 3-4 whistles on low flame or until the meat is cooked well. (3/4 cup of water and pressure cook for 10 minutes)
  8. Once the steam vents out open the lid and check if the pork is cooked well.
  9. Now on medium heat, cook the meat pieces until the oozed out water is completely dry, stirring in between. Turn off the flame. (As we prefered some gravy to it, i didn't  cook until it was completely dry)
  10. Serve hot or you can cool the pork and store it in the fridge and stir fry it when required. You can store this up to 1 week.
  11. For stir frying, heat remaining oil in a non-stick pan add cooked pork pieces and stir fry well until pork is browned. If needed drizzle oil while stir frying. (I would reheat by adding some water to it)
Note:
  1.  My variations in blue.  Variations were made mainly to adjust to taste and heat level tolerance.
  2. The assumption made for this recipe is that a pressure cooker is used for to cook the dish.  Although it is possible to cook it over a stove i am not sure if the taste will be diluted as more water will be required due to a longer time to get the meat to be tender, more so if ribs is used.  Perhaps it advisable to stick to meat or add another 10% to the amount of ingredients.

Recipe - Garlic Naan

Ingredients
  • 280 gm/10 oz/1¼ cups Strong white flour plus extra for dusting (can use All purpose flour/ Maida) (All Purpose)
  • 1 tsp Salt
  • 2-3 garlic cloves, very finely chopped
  • 1 tsp easy-blend dried yeast
  • 2 tsp Honey
  • 100ml/3½ fl oz lukewarm water
  • 4 tbsp Yogurt
  • 1 tbsp Vegetable oil, plus extra for brushing (I used Ghee) (Canola oil)
Method
  1. Sift the flour and salt together into a bowl and stir in the garlic and yeast. Make a well in the center and pour in the honey, water, yogurt and oil. Stir well with a wooden spoon until the dough begins to come together, and then knead with your hands until it leaves the sides of the bowl. Turn out on to a lightly floured surface and knead well for about 10 minutes, until smooth and elastic.
  2. Brush a bowl with oil. Shape the dough into a ball, put it in the bowl and cover with a damp tea towel. Leave to rise in a warm place for about 1-2 hours, until the dough has doubled in volume.
  3. Turn out the dough onto a lightly floured surface and knock back with your fist. Divide the dough into 6-8 equal sized balls. Cover the balls with a cling film for 5-10 minutes.
  4. Roll out each ball into a teardrop shape.
  5. Heat grilling tawa / skillet and cook both sides of Naan on a medium heat. Brush with butter / ghee and serve with your favorite side dish. (I used a frying pan brushed with a little canola oil during frying as i didn't have a tawa/skillet.  I omitted the step to brush with butter/ghee before serving since oil was already used during the frying)
Note: 
  1. I sifted the flour then let my breadmaker handle steps 1 and 2 using the Dough programme.  I then left the dough in the breadmaker until the it doubled in volume.
  2. I made 8 pieces out of it.
Recipe - Cucumber Chickpea Salad
Source: LiteHomeBake

Ingredients
  • 1 medium size japanese cucumber
  • 6 tablespoons of canned chickpeas 
  • A handful cherry tomatoes
  • 3 tablespoon plain thick yogurt
  • Salt
  • Black pepper 
Method
  1. Cut cucumber into thin half slices.
  2. Half the tomatoes.
  3. Mix cucumber, tomatoes and chickpeas in a bowl then top with yogurt, a dash of salt and some freshly ground black pepper.

"I am submitting this post to Asian Food Fest - Indian Subcontinent hosted by Chef and Sommelier."

Monday, 19 May 2014

Plain Basics from Who's Who

This is a big name! Wu Pao Chun is not only a famous baker in Taiwan but he made waves internationally when he clinched the title of Master Baker in the bread category of the 2010 Bakery Masters competition (Les Masters de la Boulangerie)  held in Paris. It is said that people throng his bakery everyday to buy his award winning Millet Wine, Rose Petal and Dried Lychee Bread, quite a mouthful, huh.  I have not had the opportunity to try any of his bakes though.

This is not his award winning bread (can't expect him to share it, can we?) but another known as Champion Toast.  I first saw it at Victoria's blog, who credited Aunty Young who adapted from ccm2poco where the recipe was first shared.  Thank you, ladies! Although i may not know how close this is to the real mccoy this recipe is a keeper for sandwich bread.  It is a simple recipe with just a few ingredients but the result is satisfying.  The bread that it produces is really soft and it stays soft for 3 days.  The other good thing is the fat content is low, only 15g.

Cottony soft bread

Some other ways to enjoy the bread...


Make a Nutella banana sandwich. Spread some nutella on a slice of bread, top it with some banana slices then cover it with another slice of bread.  Toast it in the oven for 3 minutes and you will have warm crisp bread, slightly runny Nutella and soft bananas in between!


Does this bring back old memories for you?  I remember eating more of this when i was a kid.  I had my late grandma in my thoughts when i made this, she loved toast made this way.  Spread on some butter, sprinkle some sugar and toast it until it's all hard and crunchy!  

Recipe
Reference: Victoria Bakes /Aunty Young/ccm2poco

Ingredients
  • 300g bread flour
  • 24g sugar 
  • 1 tsp salt
  • 15g unsalted butter
  • 3/4 tsp instant dry yeast
  • 198g milk
Steps
  1. Mix all ingredients (except butter) into a dough using low speed, then use medium speed to knead it into a shiny and smooth texture.
  2. Add in the unsalted butter, then knead it using medium speed until it forms dough that can be stretched into a thin, translucent membrane.
  3. Proof the dough for about 60 minutes. (Until about double the size)
  4. Divide dough into 3 equal balls, then allow to rest for another 10 minutes. (Skipped)
  5. Flatten the dough into a rectangle shape and roll it up . Rest it for 10 minutes
  6. Repeat step no. 5 to the rolled up dough, then place it on the baking tray and go for final proofing for another 50 minutes. (I used a Pullman tin for a 450g loaf and put it to bake when it was 90% full .  I baked it uncovered)
  7. Bake in a preheated oven at 190°C for 30 – 35 minutes
Note:  I combine all the ingredients and let my breadmaker handle steps 1 and 2 using the Dough programme. 

This post is linked to the event, Little Thumbs Up organised by Zoe of Bake for Happy Kids and Doreen from My little favourite DIY, hosted by Tze of Awayofmind Bakery House.

Photobucket

Monday, 3 March 2014

Happy..Happier..Happiest! ~ Orange Blueberry Pull Apart Bread

I was happy to chanced upon this recipe posted by Veronica.  It came at the right time when i was looking for something new to make with a punnet of blueberries that has been lying around for a few days.  Those blueberries though big and plump were not sweet, after eating a few son said 'Mum, why don't you make something with them?'


Happy to land on a suitable recipe at the right time and happier when i pulled this out of my oven, i thought it looked beautiful!  It would have been perfect if i had made a better judgement in apportioning the entire piece of dough.  If you look closely, you will notice that part of the loaf has a separation in the centre which is because they are actually 2 separate pieces. 


Love the sight of the folds in this loaf, they look like a paper fan to me and i love how some of the berries burst and stained the loaf with it juice :)


Just a sneak peek into one of the layers, i wasn't ready to pull it further apart, i wanted it to stay pretty a little longer :))

I hope this is good enough to show you that it's soft and moist with orange sugar and blueberry juice...need i say more?

Bread was delicious and i was happy with the pictures, dancing on cloud nine i was!  Give this a try, i highly recommend it!

Thank you very much for sharing this, Veronica!  Do hop over to see hers too and  she has some step by step pictures to guide you along.

Recipe
Reference: Minty's Kitchen

Ingredients

(A)
  • 30g bread flour
  • 1 tsp dried yeast
  • 65ml lukewarm water
(B)
  • 210g bread flour
  • 1/4 tsp salt
  • zest of 1/2 orange
  • 3/4 tbsp honey
  • 95ml  fresh orange juice
(C)
  • 25ml vegetable oil
(D)
  • 50g raw sugar
  • zest of 1/2 orange
(E)
  • 1/2 cup fresh blueberries
(F)
  • 15g butter (bring to room temperature to make it spreadable)
Steps
  1. (A) In a small bowl, mix bread flour with yeast and lukewarm water into a thick paste. Cover and leave at room temperature until the mixture becomes foamy (and you will see honeycomb texture developing beneath the foamy surface).
  2. Place dough from A, ingredients in B and C into the bread pan of the breadmaker (according to the recommended sequence stated in the instruction manual of the breadmaker).  Select Dough function.  Once the cycle completes, let dough rise until double the size.
  3. [To determine if the dough has risen enough, poke a floured finger into the  dough.  Dough shouldn't spring back quickly when finger is removed.  If it does, it is under-proved and needs more time to proof further.]
  4. Remove from bread pan then punch down dough to release trapped air.  
  5. Mix together (D) and set aside.
  6. Roll the dough into a rectangle (around 25 * 35 cm) and using a pizza cutter, cut the dough into 5 equal strips.  Brush melted butter on the first strip of dough and sprinkle evenly with orange-sugar mixture.
  7. Stack a second strip of dough over the first one, brush with melted butter and sprinkle evenly with orange-sugar mixture. Repeat the steps with the rest of the dough strips until you get a stack of 5 strips, all buttered and topped with orange-sugar mixture.9
  8. Then slice the stack crosswise through all the five layers, into 6 equal rectangles  (To be estimated according to size of pan (around 24*14* 7cm), in my case i will make it 5 the next time around). 
  9. Transfer these stacks of dough into greased loaf pan, with cut edges facing up, side by side.  Gently insert blueberries evenly in between each layer of the dough.  Cover with cling wrap and leave it to proof until almost doubled.
  10. Brush top with some milk and sprinkle on extra orange sugar (if there is any).
  11. Bake  in a preheated oven at 175C for about 30 minutes or until golden brown.  
  12. Remove the bread from the pan after 10 minutes and brush the top with melted butter if preferred.
Note:
  1. This recipe is half the portion of the one posted by Veronica.
  2. I have used my breadmaker instead of using a mixer to knead the dough.  If you are using a mixer, mix ingredients in B then add in A followed by C.  Knead until it is smooth and elastic (i.e. able to stretch it into a thin membrane without breaking).
  3. I used zest from 1 orange only since the juice collected was enough for the required amount.  

Friday, 20 December 2013

In the Mood for Christmas

Season greetings!  Christmas is just around the corner and the year will be drawing its close already! 

Its been awhile since my last post...i have been hibernating :)  But i am awake now, in time to wish all my friends out there a blessed Christmas and a beautiful new year ahead!  And I am glad that the mood for some festive treats is kicking in!


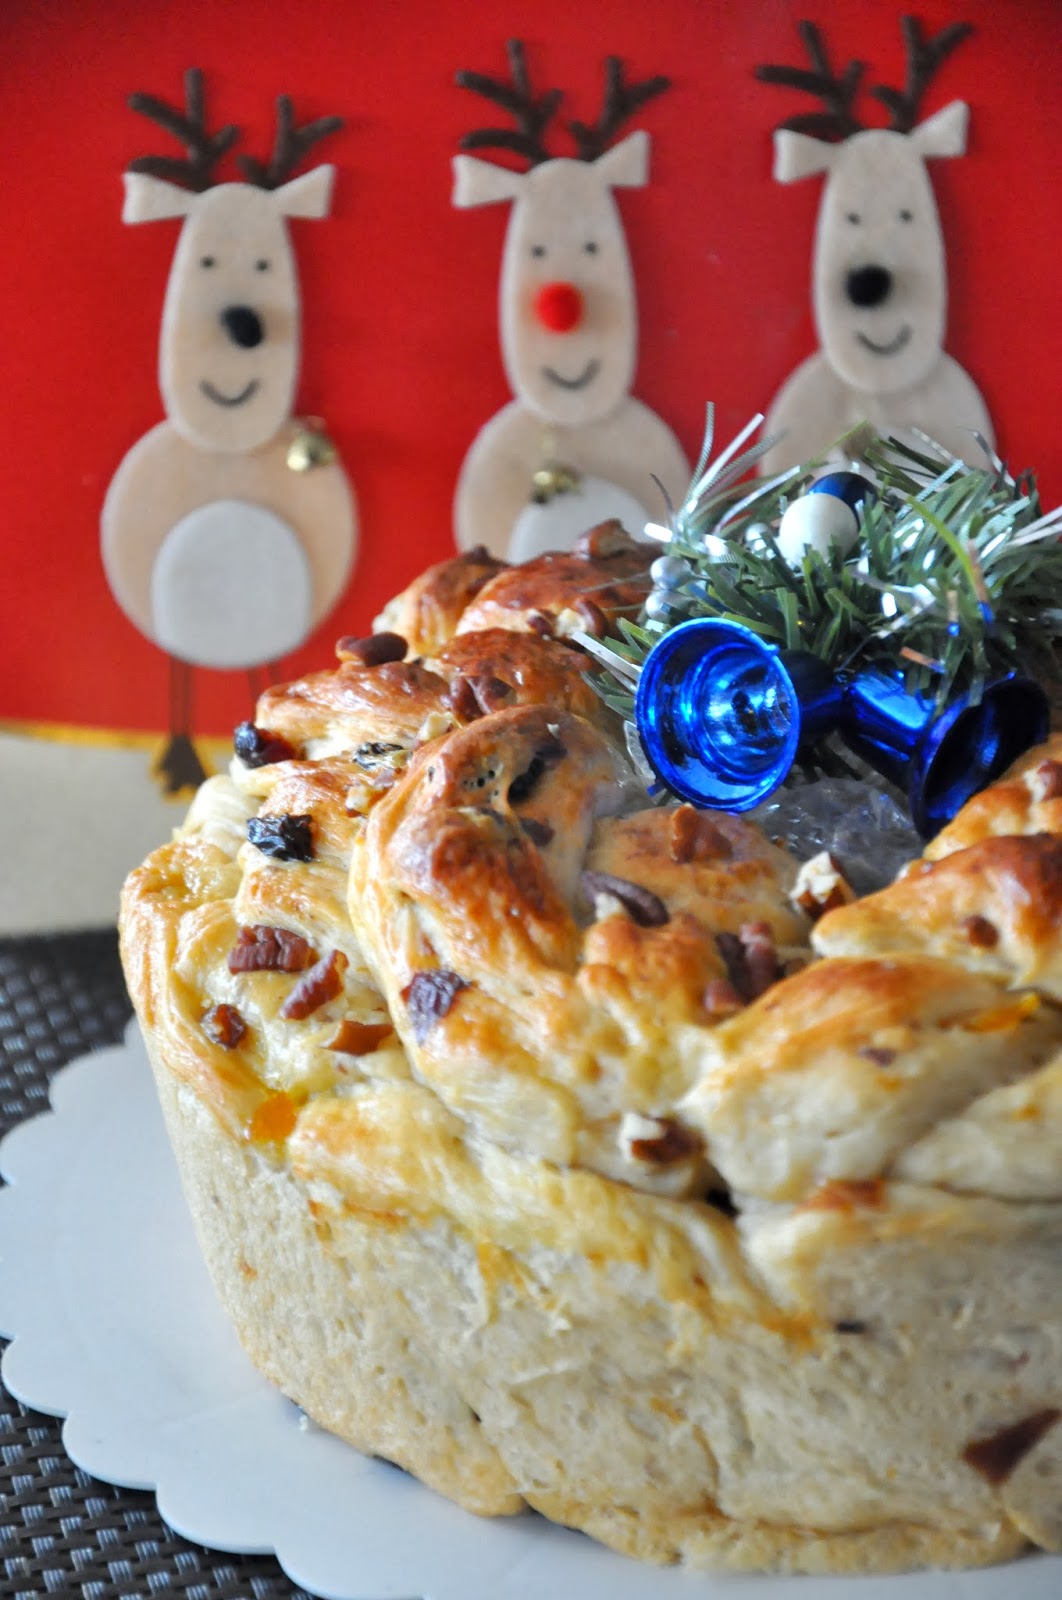
Panettone is a traditional italian christmas bake.  Some say it's the Italian version of a fruit cake since it has in it lots of raisins, dried fruits and candied citrus peel but being yeasted its very much lighter with a soft and fluffy texture.

A classic panettone is tall, cylindrical  and domed shaped. And the dough needs to be proof over a long period of time.

What i have here is a pseudo or simplified version of a Panettone. Not dome shaped for sure, i braided it for the christmas wreath look (i couldn't miss this opportunity to make something that look like a wreath bread) and i didn't follow a classic recipe.

It's tasted good nevertheless, well at least good enough for the family.  The overnight sponge dough method although not as long as proofing the entire dough for 12-15 hours still produced bread that was soft and fluffy.


Recipe
Adapted from recipe for Macadamia Fruity Bread in Magic Bread by Alex Goh

Ingredients
Part A
  • 120g bread flour
  • 85g boiling water
Part B
  • 280g bread flour
  • 60g sugar
  • 3/4 tsp salt
  • 15g milk powder
  • 6g instant yeast
  • Zest from 1 orange (3 tbsp candied kumquat)
Part C
  • 100g cold water
  • 3 egg yolks (1 large egg)
Part D
  • 80g butter
Part E
  • 30g raisins
  • 30g golden raisins (dried apricots)
  • 50g dried cranberries
  • 1 1/2 tbsp grand manier (2 tbsp orange juice)
Step
  1. Premix Part E and set aside for at least 1 hour. (Left it for 4 hours) 
  2. Add boiling water from A into flour, mix until well-blended to form dough.  Cover and set aside to cool.  Keep it in refrigerator for at least 12 hours. (Left it for 6 hours only yet bread turned out well)
  3. Mix B until well blended.  Add in C and knead to form rough dough.  Add in A and knead until well blended.
  4. Add in D and knead to form elastic dough.  Add in E and mix until well-blended. 
  5. Cover the dough with cling film and let it proof until double its original size.  
  6. Punch down dough and let it rest for 10 minutes.
  7. Form dough into a ball and place it in a cake pan.  Let it proof until double its original size.
  8. Bake at 180C for 30 minutes or until golden brown.
Note:
  1. For Step 3 and 4, I used my breadmaker to mix the dough by placing all wet ingredients followed by dry ones and adding in E after the dough has been formed.
  2. I used a 20cm chiffon pan and took out 200g of dough to proof it in 4 cupcake liners  which was meant as a gift for a friend.  The bread would have looked tall enough (i.e. more pannetone like) if the entire dough went into the pan instead.
  3. Instead of forming into a ball (i wanted the top to be christmas wreath like instead of a dome) , i divided the dough into 2 parts then cut 3 stripes out of each part and braided them.  I laid one part on top of one another into the pan.

Merry Christmas and a Blessed New Year to all my friends out there!

I am submitting this to the "Baby Sumo's Christmas Recipes Collection 2013" event which is hosted by Baby Sumo of Eat Your Heart Out.

Thursday, 3 October 2013

It's All in the Honey


Although i try out new bread recipes every so often, there are a few that are close to heart (read easy, tasty and foolproof ones).   I always run back to these handful especially when time is running short, or i am not in the mood for experiments or cannot risk something going wrong (like when it happens, kid will have nothing for breakfast before going to school the next morning!)  And one of them is Honey Buns from Happy Home Baking, i tried this out in the very early stage of my breadmaking journey, and i remember being elated when it turned out beyond my expectation for a newbie.  No, i am not trying to blow my own trumpet, it was the recipe.  A very simple recipe (no tangzhong, no overnight sponge dough etc), breadmaker friendly yet it gave soft cottony buns like those that you get in kopitiams.  In fact it was even better because it has this nice sweet floral fragrance coming from the honey used.   I felt like i struck gold to have landed on that recipe :)  From then i came to a conclusion that it's all in the honey, honey is one ingredient that makes bread really soft.

This time around, i twigged this recipe a little.  I substituted 10% of the flour with black sesame powder and gave it a custard (or as they say in French Crème Pâtissière) filling too.  I love the outcome, the buns had a nice nutty fragrance on top of the sweet floral fragrance from the honey!  May sound a little overboard, but i thought it smelt a little luxurious, probably because of the type of honey used :))   It was already smelling good at the dough stage, it got better and better when it hit the oven, feeling happy i was!

And buns go spinning...pipe spirals on top of buns to use up all the custard after filling the buns with them.


And the very soft bread texture!


And with yummy custard filling.  You can choose not to fill them or do without the black sesame powder to get plain honey milk buns.   The plain ones go very well with some butter and kaya.  Try it and you will not regret, i promise!


Recipe

Ingredients

For Buns
Source : Happy Home Baking 
  • Honey Buns 
    • 300g bread flour (200g bread flour,100g AP Flour)  
  • Black Sesame Buns
    • 200g bread flour, 70g  AP Flour (add 1 or 2 tbsp of bread flour if dough is too wet)
    • 30g black sesame seeds (toasted and ground)
  • For both Honey and Black Sesame Buns
    • 4g (about 2/3 tsp) salt
    • 4g (1 tsp) instant yeast
    • 1 egg lightly beaten plus enough milk to make 200g
    • 50g honey
    • 30g unsalted butter
    For Custard
    Source : Corner Cafe  (half recipe)
    • 250ml milk
    • 1 egg
    • 1 egg yolk
    • 1/2 tsp vanilla extract
    • 55g caster sugar
    • 15g cornflour, 5g custard powder
    • A pinch of salt (if using unsalted butter or not using butter)
    • 25g butter (for additional shine and firmness)
    Steps 

    For Custard
    1. Whisk together whole egg, egg yolk, 30ml milk, sugar and vanilla.  Mix in flour, cornflour and salt if using.
    2. Bring the remaining milk just to the boil in a saucepan.  Pour the hot milk in small stream into the egg mixture, whisking constantly with a balloon whisk as you pour (very important).  Once incorporated, pour everything back into the saucepan.
    3. Whisk the mixture over medium heat until it thickens and firms up.  Remove from heat and whisk in butter if using.
    4. Pour the hot custard into a bowl and plunge the bottom of the bowl into another larger bowl of iced-water to cool, give it a whisk occasionally.  Once it reaches room temperature, cover the surface of custard with cling film to prevent a skin layer from forming. 
    5. Alternatively fill the custard into a piping bag, twist the open end to seal up the cream.  Refrigerate until ready to use.
    For Buns
    1. Place all ingredients in the bread pan of the breadmaker (according to the recommended sequence stated in the instruction manual of the breadmaker).  Select Dough function. Check on the dough after 5 minutes of kneading, add 1 to 2 tbsp of flour is it's too wet (i.e. sticks to the hand).  Once the cycle completes, remove dough from the bread pan. 
    2. Shape the dough into a smooth round and place in a bowl. Cover and let it rise till double in volume.
    3. Remove dough and give a few light kneading on a lightly floured work surface. Press out the trapped air as your knead. 
    4. For Honey Buns-Divide into 9 equal portions and shape them into rounds. For Black Sesame Buns (with custard filling)-Weigh 50g dough for each bun.  Cover with cling wrap, let the doughs rest for 10mins.
    5. Flatten each dough into a round disc and press out the trapped air. For Black Sesame Buns-Wrapped in a heaped tablespoon of custard.   Shape into a smooth round ball.
    6. Place doughs seams side down on a 20cm by 20cm square baking tray (lightly greased with oil or butter or line it with parchment paper) or place them in paper liners.  Loosely cover with a damp cloth or cling wrap and let doughs proof for 45 ~ 60 mins or until double in size.
    7. When ready to bake, brush the surface of the dough with milk.  For Black Sesame Buns-sprinkle a combination of black and white sesame seeds and pipe some custard on buns.
    8. Bake at preheated oven at 200C for about 15 ~ 20 mins until the bread is golden brown.  Cover the surface with a sheet of aluminum foil if the surface browns too quickly. Remove from oven, unmold (except those baked in paper liners) immediately and let cool on wire rack.

    Saturday, 7 January 2012

    Missing Christmas?


    Happy New Year! May the year be filled with blessings for all of us.  6 days down, another 360 (yes, we have an extra day this year) to go, so I guess it's still not too late to wish for a blissful 360 days!

    With Christmas behind us and Chinese New Year around the corner, I know something christmasy sounds way late, something auspicious to usher in dragon luck would be more timely instead.   But hey,  don't they say better late than never, moreover this is a Christmas after-effect, made possible by a Christmas present from afar.   So, join me as I take you on a little time travel...back to Christmas :)  


    These are 2 bakes made some christmasy ingredients i received for christmas, chocolate mint and butterscotch morsels from  NESTLÉ® TOLL HOUSE.  I also found out that they have quite a bit of products with recommended recipes at their site that looks mouth-watering.  (Hint, hint, if you are reading)  I have never come across locally.  


    First up, the Butterscotch Raisin Loaf. All I can say is this was really yummy! The morsels gave the bread a sweet, nice smelling buttery taste.  After getting the bread dough ready, just roll it flat, sprinkle with butterscotch morsels and raisins and roll it up again.  I followed a new tangzhong recipe for the bread dough but I found it wet making it quite a challenge to handle, I will stick to the recipe used for Fruity Braided Bread the next time around.


    These chocolate mint cookies were good too, if you are the type who loves the minty flavour.  Little one doesn't, its like eating toothpaste to him :)  But I love them though, i like the refreshing and the slight burning effect.  I merely followed the recipe at the back of the pack, really easy.

    Thank you for the nice gift, it was a new experience for me and i enjoyed learning how to use them.

    Ok, time to go back in time, I promise it will be something that will bring the dragon roaring in the next time around! 

    Have a great year ahead, everyone!

    Thursday, 29 September 2011

    Fruity Braided Bread


    These are literally hot from the oven! Nuh, not anymore, but they were when I started writing this which was right after tasting it :)   So, if you are looking for a bread recipe to try, you could really consider this.

    So, what's this? Braided bread, I made 2 different flavours with one recipe.  I secretly (not so secretly anymore) gave myself a pat on the back when I took them out from the oven.  They looked very pretty  to me, at least.    This is the first time I tried braiding, it is a 2 strand braid, and it was very easy.   I did a mix and match to end up with this loaf.  

    In my previous bread post, the Japanese Coconut Custard Bun was made from a tangzhong method dough, courtesy of Christine who used it as a base recipe for many other variations too.  One that caught my attention was the Apple Custard Bun as I simply love the idea of fruits in baking.  I started off with the intention to try that particular one.  While waiting for my breadmaker to do the job on the dough, I went through the steps for preparing the filling.  That was when the lazy bug bit and I started having second thoughts, then came the third, the fourth...   The other excuse that I gave myself was I didn't like ending up with 3 egg whites as only yolks were used for the fillings.   I flipped through my Magic Bread book (by Alex Goh) to look for easier alternatives. There's this 'Strawberry Cream Cheese Filling Bun' that is close to Christine's Apple Custard, no eggs but whipping cream called for instead, the thought of leaving a 2/3 carton lying around in the fridge is even more unappealing than 3 egg whites.   Scouted around again and saw this recipe with cream cheese and strawberry filling but the bread was braided instead.   Fine, braid I shall then (it sounded like it was easier than rolling), to save my eggs and whipping cream! But being the stubborn one that I am, I wanted to stick to apples which was my original intention.  So, instead of Apple Custard, it became Apple Cinnamon Cream Cheese :).  But the strawberries looked good too, moreover little one loves strawberries and I had some in the fridge.  So, I split the dough into 2 and ended up with both the flavors.


    Verdict?
    This is really good.  I am happy with the results of this mix and match.  Asian style bread, western style fillings, good mix of the east and the west. The bread was soft and it blended so well with the cream cheese and fruit fillings.  You can try it with whatever fruits that you fancy.  Another lazy way would be to spread some fruit jam over it, I think it would tastes as good :)


    Recipe

    Ingredients for tangzhong
    • 25gm  bread flour
    • 125ml water (could be replaced by milk, or 50/50 water and milk)


    Ingredients for buns
    • 350 gm bread flour
    • 55 gm caster sugar
    • 5 gm salt
    • 56 gm egg
    • 7 gm milk powder (to increase fragrance, optional)
    • 125 ml milk
    • 120 gm tangzhong (all of everything made)
    • 5 gm instant yeast
    • 30 gm butter (cut into small pieces, softened at room temperature)

    Methods for making tangzhong
    1. Mix flour in water and stir until smooth and without lumps. Cook over medium-low heat, stirring consistently with a wooden spoon, whisk or spatula to prevent burning and sticking.
    2. The mixture becomes thicker and thicker. Once you notice some “lines” appear in the mixture for every stir you make with the spoon, it’s done.  Remove from heat.
    3. Transfer into a clean bowl. Cover with a cling wrap sticking onto the surface of tangzhong to prevent from drying up. Let it cool. (Note : Christine recommends chilling the tang zhong for several hours and let it come to room temperature before use.  I did not take this step, I am not sure if it makes any difference)

    Method for preparing bread dough
    1. Combine all dry ingredients: flour, salt, sugar and instant yeast in a bowl. Make a well in the center. Whisk and combine all wet ingredients: milk, egg and tangzhong, then add into the well of the dry ingredients. Knead until you get a dough shape and gluten has developed, then knead in the butter. Keep kneading until the dough is smooth, not sticky and elastic.  If  using a bread maker add all wet ingredients into bread maker first followed by dry ingredients. Add yeast the last.

    2. Knead the dough into a ball shape. Place in a greased bowl and cover with a wet towel or cling wrap. Let it proof till it's doubled in size.
    3. Transfer to a clean floured surface. Deflate and divide into 2 equal portions. Cover, let rest for 15 minutes.

    Ingredients for cream cheese fillings
    • 125 gm cream cheese
    • 50 gm caster sugar
    • 1 tsp lemon juice (I substituted with 1 tablespoon plain yoghurt to experiment)
    1. Combine and mix well with mixer. Set aside.

    Ingredients for fruit fillings


    Apple
    • 1 apple, cubed 
    • 1 tablespoon sugar
    • 1/2 tsp cinnamon
    1. Combine and mix. Set aside.


    Strawberries
    • 8 strawberries, cubed 
    • 1 tablespoon sugar
    • 1/2 tablespoon flour (if strawberries too runny add a little extra)
    1. Combine and mix. Set aside.

    Assembly
    1. Roll bread dough into a rectangle - about 10" by 6".  Place on baking sheet. Spread cream and fruit fillings down the center. Cut strips on both sides of the filling (see diagram below)
    2. Fold alternating strips over filling diagonally. Seal Ends. 
    3. Brush with  egg wash (1 egg + dash of water, whisked together), then let rise about 15 minutes.
    4. Bake in a 180C preheated oven, for about 25 minutes. 
    5. If the braid begins to brown too much cover loosely with foil.

    Assuming the diagram below is the bread dough that has been rolled into a nice rectangular shape.  Place the fillings in the centre and cut strips on both sides (make sure equal number of strips are made).

    Strips
    Place Fillings Here
    Strips
    Strips
    Strips
    Strips
    Strips
    Strips
    Strips
    Strips
    Strips
    Strips
    Strips
    Strips
    Strips
    Strips
    Strips

    Share

    Twitter Delicious Facebook Digg Stumbleupon Favorites More