Advertisement 300 X 250

Girls' Best Friend

Bright and sparkly. Gemstones came to my mind when I was removing this Dragon Fruit and Orange jelly from the mould. Like a combination of gemstones...rubies, amber and diamonds, all in one!

Dragon's Eyes

The literal translation for the name of a small brown, juicy exotic fruit from the lands of Asia, known as Longan in Chinese, packed into these muffins

Nostalgia

A taste from the humble beginnings, the Long Bean Rice brings back beautiful memories of the yesteryears

Light and Fluffy

Lemon, Yogurt and Cranberries~a nice blend of flavours in a light and fluffy chiffon cake

Bread Stories

Asian style buns ~ Popular as breakfast food or snack, sweet/savoury fillings wrapped in soft, cottony bread

Thursday 29 May 2014

Bread Basics ~ Buns


I am going back to the basics these days (plain laziness in disguise actually) when it comes to bread making.  Instead of trying out the more sophisticated methods, i went back to good straight dough method recipes.  I shared a  simple straight dough method milk loaf recipe recently and this one here is a recipe from Chef Alan Ooi for making buns which i use regularly.  Once you get the dough right you are on a roll, fill them as you wish.

If you are new to bread making, this could be the recipe to try. Easy and not too big lest you mess up and feel guilty about the wastage. A recipe that is just nice for a small/medium size family like mine. With 300g of flour, it yields around 10 53-55g buns which is enough for my family over 2 days.

This one here has some butter and cheese wrapped in it with cheese toppings too.  When the cheese inside melts, it will cause the top to cave in and look wrinkled which i find kinda cute :)

Beautiful soft texture from a simple method.  Good enough for something homemade, don't you think?

I apportioned out the dough for 6 butter cheese buns and turned the rest into 3 of these.  I was being adventurous instead of the usual pair of raisins and cinnamon, i paired it with candied nutmeg strips. I have tried adding nutmeg strips in cakes and i found that i like them a lot so i decided to try it out with buns.  Call me bias but i swear by Penang nutmegs specifically the Bell brand ones, i have tried another but they turned out looking bluish after baking which made them look gross and i stayed away thereafter.  

I took a cue from a William Sonoma's classic cinnamon buns that i saw a few of my blogger friends made for a Bake Along event.  I adapted the sticky sugary glaze which i tend to leave when making cinnamon rolls.  This glaze was applied on the pan before putting the bread dough into the pan.


Just a few strips of nutmeg here and there, aromatic, sticky sweet and spicy all in one.  A word of caution though they say nutmeg can cause hallucinations for some :))

Bread Dough recipe here

Butter Cheese Buns

Ingredients
  • 6 slices of cheddars cheese, cut into small strips
  • 6 small 1/2 inch cube of butter
  • 3 tsp sugar
Method
  1. Take a portion of dough that has been previously shaped into a ball.
  2. Flatten dough then wrap in cheese strips from 1/2 slice of cheddar cheese, a cube of butter and 1/2 tsp sugar.
  3. Arrange on grease tray or place in paper liners.
  4. Cover and rest buns until double the size again.
  5. Glaze with egg mixture (refer Part D of bread recipe) then top with cheese strips from the other 1/2 piece of cheddar cheese. 
  6. Bake in a preheated oven at 180C for 15 minutes until golden brown.
Nutmeg cinnamon buns
Reference for Syrup Paste/Cinnamon Sugar: Her Frozen Wings

Ingredients
Syrup paste
  • 30gm brown sugar
  • 20gm melted butter
  • 3 tbsp golden syrup/ light corn syrup
Method
  1. Mix the sugar, melted butter and the syrup together to a smooth paste. 
  2. Scoop or pour into the base of the baking tin, spread over. Set aside.
Cinnamon sugar
Ingredients
  • 1/4 cup of sugar mix with 1tsp ground cinnamon
  • 6 tsbp nutmeg strips
  •  Soften butter
Method to make buns
  1. Take a portion of dough and roll it into a flat rectangular.
  2. Brush with some butter and sprinkle the dough with cinnamon sugar mixture and top with 2 tbsp nutmeg strips. 
  3. Starting at short edge, roll the dough tightly into a cylinder. Cut the cylinder into 3 pieces and place them into the prepared baking tin. Cover and let the dough rise until double.
  4. Preheat the oven  to 180C, brush the rolls with some melted butter, bake for about 15 mins, place a wire rack over each pan and invert the rolls. Let cool.
This post is linked to the event, Little Thumbs Up organised by Zoe of Bake for Happy Kids and Doreen from My little favourite DIY, hosted by Tze of Awayofmind Bakery House.

Photobucket

Other buns using the same recipe

Apple Buns - recipe here

Kaya Cheese Buns - recipe here

Monday 26 May 2014

From Incredible India

Asia Food Festival blogging event moves on from Korea to India this month.   My family and I are more familiar with the spicy side of Indian cuisine although there's a whole kaleidoscope of diversity that we have yet to experience.  Very limited exposure i must say but we have always enjoyed this side of it.  Breakfast items like the various indian breads are almost a weekly event too. 

Although hubs and i love Indian food, i seldom make it at home for two reasons.  Firstly, my son's heat level tolerance is relatively low compared to us and secondly i am intimidated by the many types of spices used.    I tend to forget and get confused about which is which.   Cumin and fennel for example, they look very similar and it does not help that their Malay names are very close, Jintan Putih for Cumin and Jintan Manis for Fennel, now how's that to add to the confusion?

So, i set out to look for Indian recipes that would be simple enough for me to tackle.  Simple as in not too long list of ingredients and most importantly spices that are not foreign to me.  I was glad to find Swapna's Cuisine.  She had this pork recipe named Nadan Panniyearchi Ularthiyathu/Kerala Style Pork Fry.  I thought I could try this with pork ribs instead to add to my collection of pork ribs dishes from the various Asian countries alongside this event.  If you like pork ribs, you may want to check out these delicious ribs recipes from ThailandJapan and Korea too.

This Kerala version turned out delicious and i am now convinced that one doesn't actually need coconut milk to make it so.  Our localized version of curries almost always have coconut milk in them turning them into something that is not the healthiest food to take often.

The other thing that i like about her recipe is that she included a recipe to make a meat masala from scratch which were a combination of some spices that i had on hand, so instead of running to the store to get a bottle of meat masala (which does not come cheap), i could just put it together myself.


When the meat dish was successful, i got more confident and started looking for more on Swapna's blog to make it a complete Indian meal.   And this was the Indian meal we ended up with on that day.   Best eaten with hands!  Garlic Naan bread to go with spicy ribs and a yogurt based salad to balance the meal and cool down the heat :)


I find this naan recipe quite unique, credits to Swapna again for the recipe.  Yogurt and honey was in its ingredient list and based on my experience so far, even when used separately yogurt and honey are ingredients that gives us soft fluffy bread.  I couldn't wait to try the results when both of them are put together.  It was crisp on the outer layer but fluffy soft inside when eaten hot.  I could just eat them like that :).

As for the salad, it was just a simple recipe that i made up inspired by the cucumber salad that is frequently served as a side dish for banana leaf rice at Indian restaurants.   

Recipe - Kerala Style Spicy Pork Ribs

Ingredients
  • Pork – 1 kg, cut in to cubes and cleaned (800g pork ribs)
  • Coconut slices / Thengakothu – ½ cup (omitted)
  • Onion-2 big, sliced (used only 1 since the onion was quite big)
  • Pearl onions / Chumannulli – ½ cup sliced (omitted)
  • Ginger, minced – 1 ½ tbsp 
  • Garlic minced – 1 ½ tbsp
  • Green chillies -3 or 4 sliced (omitted)
  • Homemade Erachipodi / Meatmasala -3 to 4 tbsp (OR you can add 1 ½ tbsp chilly powder, 1 ½ tbsp Coriander powder, ½ tsp- Turmeric powder, 2 tsp- Pepper powder, 6 cardamoms, 6 cloves, 3 x 1” piece cinnamon sticks all powdered together) (1 tbsp chilly powder, 1tbsp Coriander powder, ½ tsp- Turmeric powder, 1 tsp- Pepper powder, 4 cardamoms, 4 cloves)
  • Curry leaves – few
  • Mustard seeds – 1 tsp (1 tsp mixed spice with combination of mustard seeds, fenugreek, cumin, fennel) 
  • 1 2” piece cinnamon stick
  • 1 medium size tomato, cubed
  • Oil- 2 to 3 tbsp
  • Salt to taste 
Method
  1. Heat 2 tbsp oil in a pressure cooker and splutter mustard seeds.
  2. Add coconut pieces / thengakothu and stir fry until coconut pieces are light brown (omitted)
  3. Add sliced onion, pearl onion, ginger, garlic and curry leaves; stir fry until onions become limp.
  4. Add in tomatoes, mix well and stir fry until tomatoes soften.
  5. Reduce flame and add erachi podi / meat masala and sauté making sure not to burn the powder.
  6. Add cleaned pork pieces and continue stirring until masala coat pork pieces and meat turns opaque and smell fragrant.  
  7. Add ¼ cup of hot water and pressure cook the pork for 3-4 whistles on low flame or until the meat is cooked well. (3/4 cup of water and pressure cook for 10 minutes)
  8. Once the steam vents out open the lid and check if the pork is cooked well.
  9. Now on medium heat, cook the meat pieces until the oozed out water is completely dry, stirring in between. Turn off the flame. (As we prefered some gravy to it, i didn't  cook until it was completely dry)
  10. Serve hot or you can cool the pork and store it in the fridge and stir fry it when required. You can store this up to 1 week.
  11. For stir frying, heat remaining oil in a non-stick pan add cooked pork pieces and stir fry well until pork is browned. If needed drizzle oil while stir frying. (I would reheat by adding some water to it)
Note:
  1.  My variations in blue.  Variations were made mainly to adjust to taste and heat level tolerance.
  2. The assumption made for this recipe is that a pressure cooker is used for to cook the dish.  Although it is possible to cook it over a stove i am not sure if the taste will be diluted as more water will be required due to a longer time to get the meat to be tender, more so if ribs is used.  Perhaps it advisable to stick to meat or add another 10% to the amount of ingredients.

Recipe - Garlic Naan

Ingredients
  • 280 gm/10 oz/1¼ cups Strong white flour plus extra for dusting (can use All purpose flour/ Maida) (All Purpose)
  • 1 tsp Salt
  • 2-3 garlic cloves, very finely chopped
  • 1 tsp easy-blend dried yeast
  • 2 tsp Honey
  • 100ml/3½ fl oz lukewarm water
  • 4 tbsp Yogurt
  • 1 tbsp Vegetable oil, plus extra for brushing (I used Ghee) (Canola oil)
Method
  1. Sift the flour and salt together into a bowl and stir in the garlic and yeast. Make a well in the center and pour in the honey, water, yogurt and oil. Stir well with a wooden spoon until the dough begins to come together, and then knead with your hands until it leaves the sides of the bowl. Turn out on to a lightly floured surface and knead well for about 10 minutes, until smooth and elastic.
  2. Brush a bowl with oil. Shape the dough into a ball, put it in the bowl and cover with a damp tea towel. Leave to rise in a warm place for about 1-2 hours, until the dough has doubled in volume.
  3. Turn out the dough onto a lightly floured surface and knock back with your fist. Divide the dough into 6-8 equal sized balls. Cover the balls with a cling film for 5-10 minutes.
  4. Roll out each ball into a teardrop shape.
  5. Heat grilling tawa / skillet and cook both sides of Naan on a medium heat. Brush with butter / ghee and serve with your favorite side dish. (I used a frying pan brushed with a little canola oil during frying as i didn't have a tawa/skillet.  I omitted the step to brush with butter/ghee before serving since oil was already used during the frying)
Note: 
  1. I sifted the flour then let my breadmaker handle steps 1 and 2 using the Dough programme.  I then left the dough in the breadmaker until the it doubled in volume.
  2. I made 8 pieces out of it.
Recipe - Cucumber Chickpea Salad
Source: LiteHomeBake

Ingredients
  • 1 medium size japanese cucumber
  • 6 tablespoons of canned chickpeas 
  • A handful cherry tomatoes
  • 3 tablespoon plain thick yogurt
  • Salt
  • Black pepper 
Method
  1. Cut cucumber into thin half slices.
  2. Half the tomatoes.
  3. Mix cucumber, tomatoes and chickpeas in a bowl then top with yogurt, a dash of salt and some freshly ground black pepper.

"I am submitting this post to Asian Food Fest - Indian Subcontinent hosted by Chef and Sommelier."

Thursday 22 May 2014

Classically Sinful!


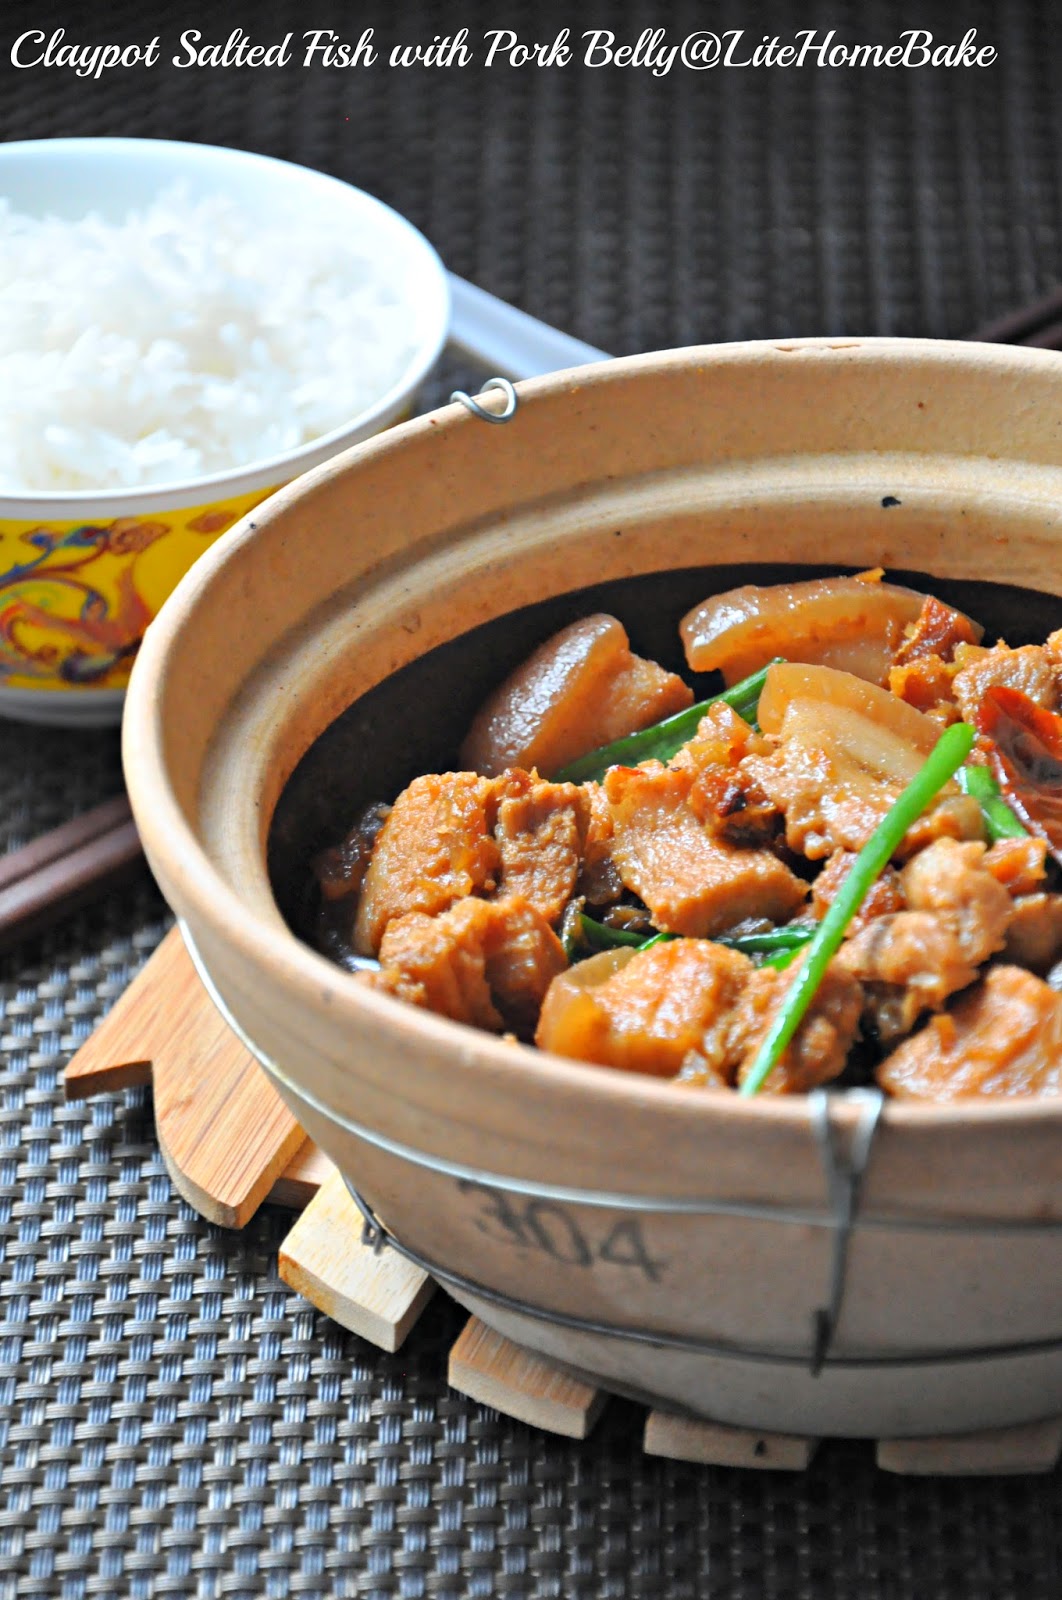
This is a classic Chinese dish.  Let me guess,  the first thing that catches your attention would be those fatty layers and then the word sinful follows suit :)  Yes, guilty i am!  I know it's unhealthy but there's something about how meat and fat are nicely layered in pork bellies that make them irresistible!  And paired with salted fish which they say is also in the unhealthy category, they become the best partners in crime making this dish totally delicious, tempting and unforgettable!  To sin be it then...occasionally and repent after and the cycle goes on and on :))  If you are a Chinese like me, it gives you the more reason to make this,  we need to know how to make our classics, don't we?

The flavors in this dish is intense resulting from the marriage of salted fish and soy sauce.  It is not something that appeals to everyone especially if you are not a fan of salted fish.  But for those of us who appreciate it, it is pure pleasure eaten with rice.  


If you have extras, count yourself lucky since it tastes even better over time.  Over here, i have it served the traditional way with some porridge (with some sweet potatoes thrown in) and long beans omelette.  Simple yet  complete and very satisfying meal.

My early attempts were made based on Amy Beh's recipe but i have since adapted it to suit our family's preference both ingredients and cooking method.

Recipe

Ingredients
  • 300g pork belly, sliced thinly
  • 50g boneless salted fish meat
  • 6 slices ginger
  • 1/2 of an onion, cut into wedges
  • 2 dried red chillies, cut into 2cm sections, seeded
  • 4 stalks spring onion, cut into 4cm lengths
Seasoning (A)
  • 2 tbsp oyster sauce
  • 1 tsp sesame oil
  • 1 tsp sugar or to taste
  • 1 tsp pepper
Seasoning (B)
  • 1 tbsp Hua Tiau wine
  • 250ml water 
  • 1 tbsp light soy sauce
  • 2 tbsp thick soy sauce
Method
  1. Marinate the belly slices with seasoning (A). 
  2. Cut the salted fish into small little cubes.   Heat up 1 tablespoon of oil in a claypot then fry salted fish until crisp and fragrant. Set aside.
  3. Add another tablespoon of oil into the claypot.  Once heated add in ginger and onion.  
  4. Add in belly slices when ginger and onion start to smell fragrant.  Mix well.  Cover and cook for another 2-3 minutes until meat turns opaque.
  5. Add in soy sauce and dried chillies as in Seasoning B.  Mix well.  
  6. Add in water then cover the pot and let it come to a boil. Lower the flame and let it simmer until meat is soft. 
  7. Add in salted fish cubes and allow to simmer for another 2-3 minutes.
  8. Add spring onions and serve immediately from the pot!

Monday 19 May 2014

Plain Basics from Who's Who

This is a big name! Wu Pao Chun is not only a famous baker in Taiwan but he made waves internationally when he clinched the title of Master Baker in the bread category of the 2010 Bakery Masters competition (Les Masters de la Boulangerie)  held in Paris. It is said that people throng his bakery everyday to buy his award winning Millet Wine, Rose Petal and Dried Lychee Bread, quite a mouthful, huh.  I have not had the opportunity to try any of his bakes though.

This is not his award winning bread (can't expect him to share it, can we?) but another known as Champion Toast.  I first saw it at Victoria's blog, who credited Aunty Young who adapted from ccm2poco where the recipe was first shared.  Thank you, ladies! Although i may not know how close this is to the real mccoy this recipe is a keeper for sandwich bread.  It is a simple recipe with just a few ingredients but the result is satisfying.  The bread that it produces is really soft and it stays soft for 3 days.  The other good thing is the fat content is low, only 15g.

Cottony soft bread

Some other ways to enjoy the bread...


Make a Nutella banana sandwich. Spread some nutella on a slice of bread, top it with some banana slices then cover it with another slice of bread.  Toast it in the oven for 3 minutes and you will have warm crisp bread, slightly runny Nutella and soft bananas in between!


Does this bring back old memories for you?  I remember eating more of this when i was a kid.  I had my late grandma in my thoughts when i made this, she loved toast made this way.  Spread on some butter, sprinkle some sugar and toast it until it's all hard and crunchy!  

Recipe
Reference: Victoria Bakes /Aunty Young/ccm2poco

Ingredients
  • 300g bread flour
  • 24g sugar 
  • 1 tsp salt
  • 15g unsalted butter
  • 3/4 tsp instant dry yeast
  • 198g milk
Steps
  1. Mix all ingredients (except butter) into a dough using low speed, then use medium speed to knead it into a shiny and smooth texture.
  2. Add in the unsalted butter, then knead it using medium speed until it forms dough that can be stretched into a thin, translucent membrane.
  3. Proof the dough for about 60 minutes. (Until about double the size)
  4. Divide dough into 3 equal balls, then allow to rest for another 10 minutes. (Skipped)
  5. Flatten the dough into a rectangle shape and roll it up . Rest it for 10 minutes
  6. Repeat step no. 5 to the rolled up dough, then place it on the baking tray and go for final proofing for another 50 minutes. (I used a Pullman tin for a 450g loaf and put it to bake when it was 90% full .  I baked it uncovered)
  7. Bake in a preheated oven at 190°C for 30 – 35 minutes
Note:  I combine all the ingredients and let my breadmaker handle steps 1 and 2 using the Dough programme. 

This post is linked to the event, Little Thumbs Up organised by Zoe of Bake for Happy Kids and Doreen from My little favourite DIY, hosted by Tze of Awayofmind Bakery House.

Photobucket

Tuesday 6 May 2014

It's Magic!

If you have not tried Shio Koji, trust me, you have got to go look for it!   I have read that some of the Japanese people call this their magical seasoning and i tell you i can't agree more!  It is really, really delicious and the best part is it's so versatile and simple to use!   All you need is basically this one seasoning and it will bring out the best flavors in both meat and vegetables whether you braised, fry, steam or even just as a seasoning for salad or pickle!      

I have Nami of Just One Cookbook to thank for introducing me to this magical ingredient.  I got to know about it when she posted this dish on her blog.  It came at the right time as I was about to go for a holiday in Japan.  I made a mental note to look for it when i get there.  Initially, I tried looking for it on my own when i got to a supermarket but i gave up after some time and got some help instead as most of the stuff does not have any English labelling on them.  I went to a wrong section, i thought it was probably on the aisle where all the sauces are since the one I saw at Nami's was in a sauce bottle but the young man brought me all the way to where it was and pointed it out to me. Service in Japan is just ichiban!  It's at the refrigerated area, btw :)

So, what is shio koji?  Koji is essentially rice that's been inoculated with the koji mold.  When it is combined with water and salt and allowed to ferment it turns to shio koji where shio means salt.  In appearance, it looks like rice porridge with some rice grains still visible though i have read that it can also look like a puree.  Koji is also the ingredient used for making soy sauce, sake and miso in Japan.

Coming back to this dish, this is my third time making it already and there goes all the shio koji that i brought back from Japan.  I went hunting for more in our local Isetan supermarket and was very happy to find it available, so fellow Malaysians you know where to get it if you are interested to try :)  It's at the section where they place sashimi.  They also have salmon that has been pre-marinated with shio koji for sale.  That's the pack that i got from Isetan KL.

This is a no fuss dish, so simple yet one gets blown away by the flavors!  Some sweetness mixed with a savory depth that has a miso-like aroma.  The chicken is marinated with shio koji then pan fried for awhile to give it some browning before adding in some root vegetables and lastly braised with some wine until chicken is tender.  Shio koji has a tenderizing effect on the meat too.

I have my own twist to this recipe now that i have made it a couple of times. The addition of Japanese sweet potatoes makes the dish sweeter and vice versa the potatoes taste really good with the umami flavors of shio koji blending into them.  I have also added in some mini king oyster mushrooms that never seems to be enough for us :)

Besides this dish, i have used shio koji as a marinade for fish before steaming or panfrying it.  I have read that the rule of thumb on the amount of shio koji to be used is 10% of the weight of food to be marinated and finds that it suits our family's taste buds.

The only downside to shio koji is it's expensive in Malaysia.  A small pack of 200g cost me RM16.90 (around USD5).  There are guides out there on how to make your own though.  An important point to remember is shio koji burns easily.  Do make sure you use low-medium flame if you are  pan frying fish/meat that is marinated with just shio koji, and yes i burnt my way to learned this :)  And like most other marinade, the longer it is left to marinate, the better it taste.

I am going to stop waxing lyrical about it, you have got to try it yourself but i admit i am a little crazy about it :)

Recipe
Reference: Just One Cookbook

Ingredients
  • 4 (about 1 lb) bone-in, skin-on chicken thighs, rinsed and pat dry (2 chicken thighs)
  • 2 tbsp Shio Koji
  • 2 cloves garlic, minced/crushed
  • 1 tbsp all-purpose flour (omitted)
  • 1 tsp paprika (omitted)
  • 1/2 tsp dried rosemary (2 sprigs rosemary)
  • 1/2 tsp dried oregano (1 tbsp fresh oregano)
  • 1 tbsp olive oil
  • 1 thin carrot, cut into 2 inch thick slices
  • 1/2 large onion, cut into 4 wedges
  • 1 cup chicken broth (400ml water)
  • 1/4 cup dry white wine (1/4 cup sake)
  • 1 small red potato (1 small russet potato)
  • 1 medium size Japanese sweet potato)
  • 150g mini king oyster mushrooms (cut the bigger ones into half otherwise leave it whole)
  • 1 tablespoon corn flour
Method
  1. Put the chicken, shio koji, and garlic in a large plastic bag and massage ingredients together. Marinate in the bag for 30 minutes. (Left to marinate for 2 hours in the fridge)
  2. Add flour, paprika and herbs to the bag and shake to coat. 
  3. Heat oil in a Dutch oven over medium heat. Place chicken (skin side down) and remaining marinade into the Dutch oven. (I used a pressure cooker with stir fry function but a deep pot would work find too)
  4. Cook 3 minutes on each side or until lightly brown.
  5. Add carrot and onion and cook for 2-3 minutes, stirring constantly.
  6. Add broth, wine, and potatoes and bring to a boil.
  7. Reduce heat and simmer covered for 40 minutes or until chicken is done and vegetables are tender. (Simmered for 15 minutes, then changed to high pressure function for 7 minutes).
  8. If mushrooms are used, add them in about 10 minutes before turning off the flame or if cooking in high pressure, add them in just before setting on high pressure.
  9. If you like a thicker sauce, remove about 2 tablespoons of the sauce and allow it to cool.
  10. Dissolve corn flour with the sauce that has been removed then pour it back into the pan and allow it to come to a boil again to  thicken the sauce.
  11. Garnish with freshly ground black pepper before serving.

Friday 2 May 2014

I Not Stupid, Mum!


Lotus root soup is very popular among the Chinese.  We believe it is nourishing and has a cooling effect.  A typical version is made with either pork ribs/chicken, peanuts and red dates, a pretty simple concoction but results in an amazing taste.  Among other variations that are just as delicious are those with the addition of root vegetables like carrots or kudzu root and legumes like black beans. 

I had lotus root in my fridge the other day but i had ran out of both pork ribs/free range chicken so i thought it would be a good excuse to make a vegetarian version :)  And i had something mischievous up my sleeve, i wanted to test if this meatless version would go by unnoticed by the men in my house who are meat lovers. Wondering how something so obvious would go by unnoticed?  Surely the eyes would tell, you must be thinking but most of the time they would only drink the soup without eating any of the ingredients so I actually put very little of the ingredients in their  soup bowls. Hence, it would be more of a taste test rather than a sight test in this case.  I know chances are slim that it will go unnoticed but no harm trying and if it does or even if they like the taste of it could be the start to more meatless soups!

I decided to use a recipe from Amy Beh, a celebrity chef who is also a columnist who shares her recipes in one of our local dailies as a reference.  Bean sticks were used as a substitute for meat protein.  The Chinese herbs called for were very much similar to those used in a meat version but the addition of ginger and dried lily buds gave a slightly different flavor to the soup.   Unlike in a typical version there were no peanuts in this one but i added a few walnuts to give it some nutty flavor and oil since walnuts are rich in Omega-3 fatty acids.

Overall i find myself enjoying the soup but i must admit that i am a soup lady, i love almost any soup!  The soup was very clear and had a refreshing taste with some heat coming from the ginger. There was quite some bite too with the addition of bean sticks and lily buds.  

So, did it go by unnoticed? The answer is 'No', unfortunately :(  My young man thought it tasted funny and wasn't as tasty.  I presumed the 'funny' taste that he was referring to came  from the bean sticks, ginger and lily buds while not as 'tasty' meant it didn't have the heavy taste from meat proteins.  Experiment failed!  Mum got busted..."I am not stupid, Mum!"


Recipe
Reference: Kuali.com

Ingredients

(A)
  • 100g lotus root, skinned and cut into thick strips (300g)
  • 25g yuk chuk, rinsed and soaked (replaced with 2 tbsp goji berry)
  • 10 red dates
  • 5g dong gwai (replaced with a 5 thin slices of American ginseng)
  • 6 walnuts
  • 2 pieces dried beancurd sticks, soaked till soft and cut into 4cm pieces (3 pieces)
(B)
  • 10g ginger, shredded (3 thin slices from 1 inch knob)
  • 15g dried lily buds, knotted, rinsed and soaked
  • 2 litres water (3 litres)
Seasoning
  • 1 tsp salt
  • 1/4 tsp pepper
  • 1 tsp vegetarian seasoning powder (omitted)
  • 1/8 tsp sugar or to taste (omitted)
  • 1/2 tsp sesame oil (omitted)


Method
  1. Combine ingredients (A) and water in a deep pot.  Bring to a boil.  Reduce the heat and simmer for 15-20 minutes. (40 minutes)
  2. Add ingredients (B) and boil for 5-6 minutes (10 minutes). Season to taste. Dish out and serve the soup hot.


Share

Twitter Delicious Facebook Digg Stumbleupon Favorites More